Microsoft Azure platform offers quite a few messaging services options. In a prior article I wrote about an interesting scenario and effective integration points between API Management and Azure Service Bus Relay.
In this article I am going to cover another interesting option for integrating API Management with Azure Service Bus Queues and Topics.
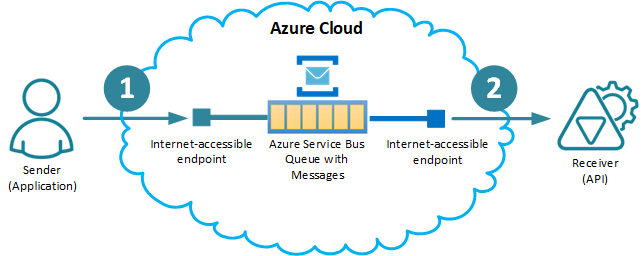
In general, queued messages must be sent to a queue by a Sender (1), and received from a queue by a Receiver (2). In case of Azure Service Bus, sender and receiver can be anywhere, in the cloud or on-premises, because Azure Service Bus has internet-accessible endpoints to send messages to, and to receive messages from:
So, how does API Management fit into this picture, and what will be the benefits of integrating it with the Azure Service Bus Queues?
It should be expected that API Management can fit on both sides, helping Sender to send messages and helping Receiver to receive messages:
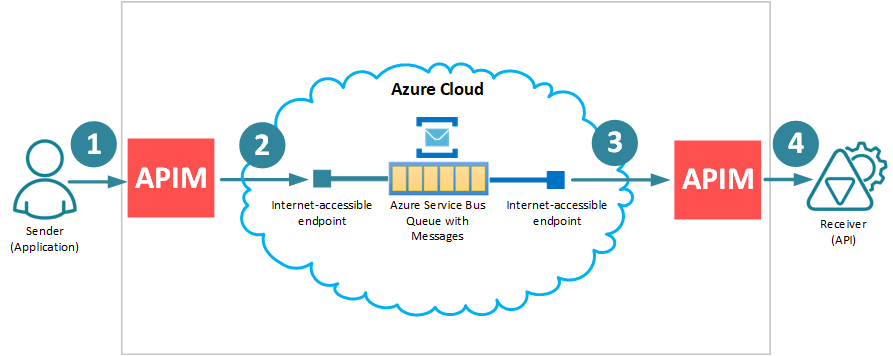
If that is the case, the benefits will be:
Sender does not have to deal with Azure Service Bus at all, instead it sends messages to what seems to be a “regular” API hosted in an API Management’s API Gateway using any security and communication protocol it wants (marked as (1) on the diagram above).
Receiver does not have to deal with Azure Service Bus either. Instead, it receives messages from an API Management’s API Gateway using any security and communication protocol it wants (marked as (4) on the diagram above).
Sender application and Receiver API are simplified, because the existence of API Management infrastructure and even Azure Service Bus itself becomes completely transparent for them. That means you can build and deploy them anywhere just as “regular” API Client applications and “regular” API Service applications, and yet enable them with asynchronous messages delivery at zero implementation cost shifting all the challenges onto an API Management infrastructure.
All other typical benefits of using API Management also apply here, such as managed security, monitoring, API analytics and dashboards, API Catalog with APIs’ life-cycle management, etc.
To achieve the benefits listed above, an API Management infrastructure must be “smart” enough to know how to natively send (2) and receive (3) messages to and from Azure Service Bus Queues. This is not an easy task for API Management. Actually, sending messages is less challenging because it can be implemented via a REST API call to the internet-accessible Azure Service Bus endpoint (there are still few challenges there, because that endpoint requires specially-built security headers with Shared Access Signature, SAS). Receiving messages by an API Management from Azure Service Bus is an even more challenging task, because on top of the same special SAS security, it also requires at least an additional polling mechanism to get messages from a queue once they become available.
Nevatech Sentinet API Management can natively send and receive Azure Service Bus Queue messages because within its API Gateway engine it can leverage Microsoft WCF technology, which has already implemented all that functionality in its NetMessagingBinding for SOAP services. All this can be done simply using only the Sentinet API Management Portal.
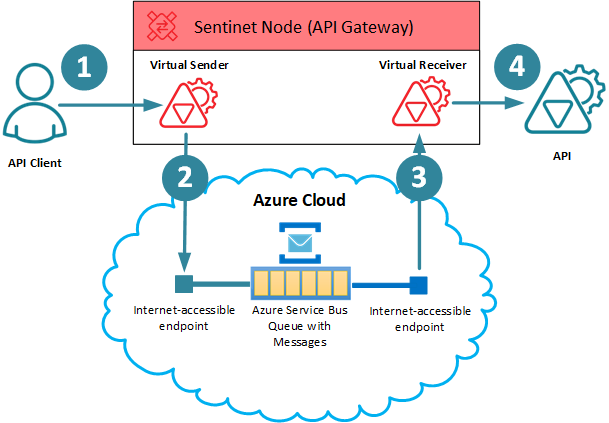
You can use a regular SOAP Client (for example SOAPUI) and a regular SOAP service (WCF Customer Search sample service shipped with Sentinet free trial edition). First, we need to enable existing Sentinet Node (API Gateway) with the knowledge of Azure Service Bus. Then we can design two virtual (façade) SOAP services hosted in the same Sentinet Node (API Gateway):
- Virtual Sender receives a message from an API Client application over regular transport (1), and then sends it to an Azure Service Bus Queue (2).
- Virtual Receiver receives a message from an Azure Service Bus Queue (3), and then sends it to a physical (backend) API over regular transport (4).
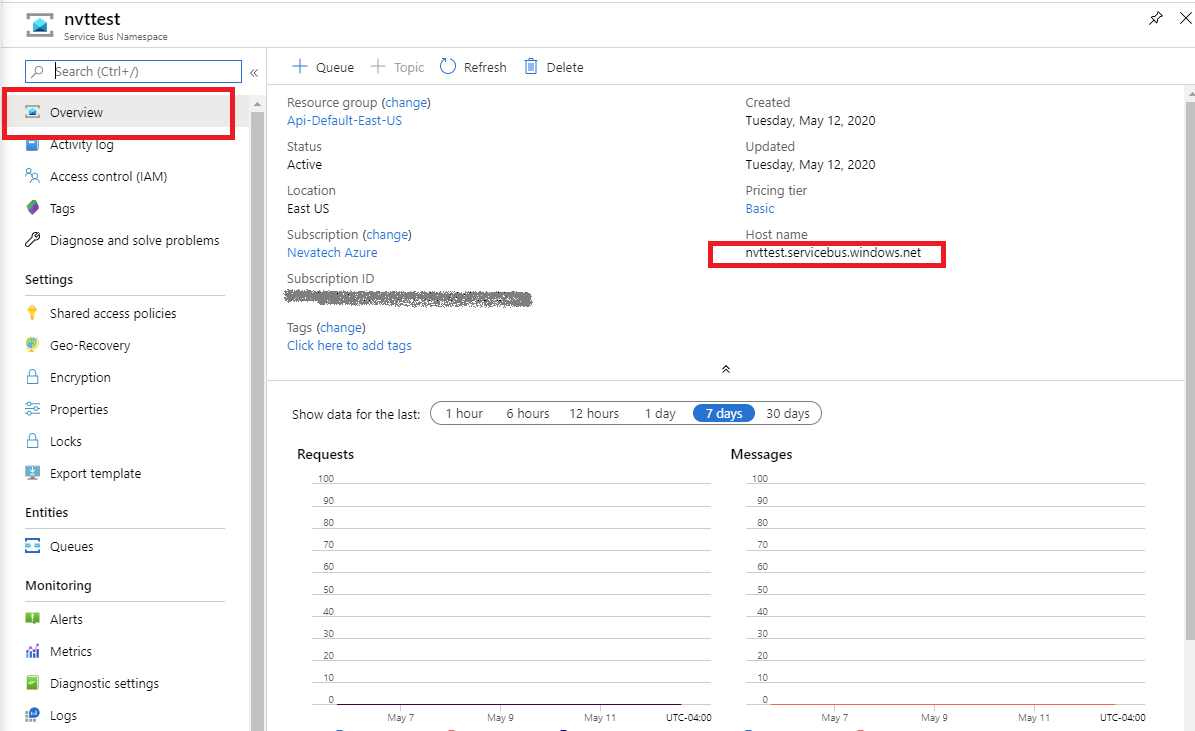
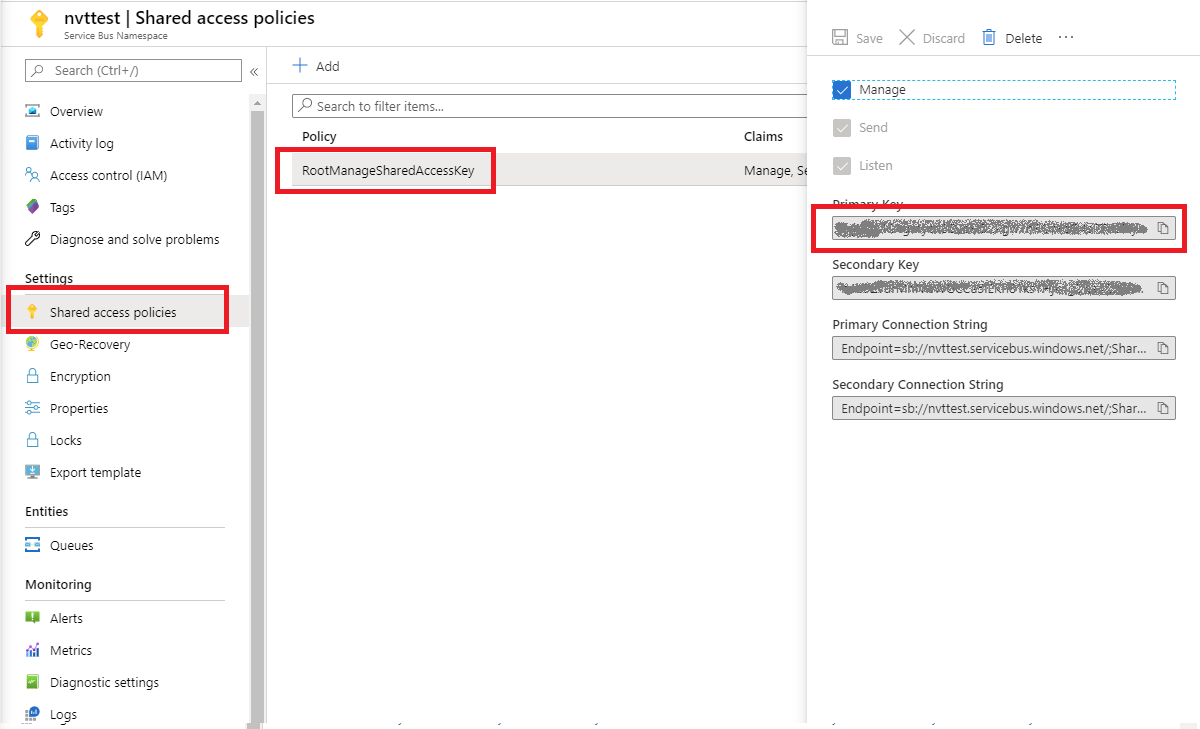
If you do not have Azure Service Bus service created yet for your subscription, you can create it using Azure Portal. Sentinet needs to know only 2 properties of your Service Bus service, its namespace/host name (for example, nvttest.servicebus.windows.net) and its key for Shared access policy:
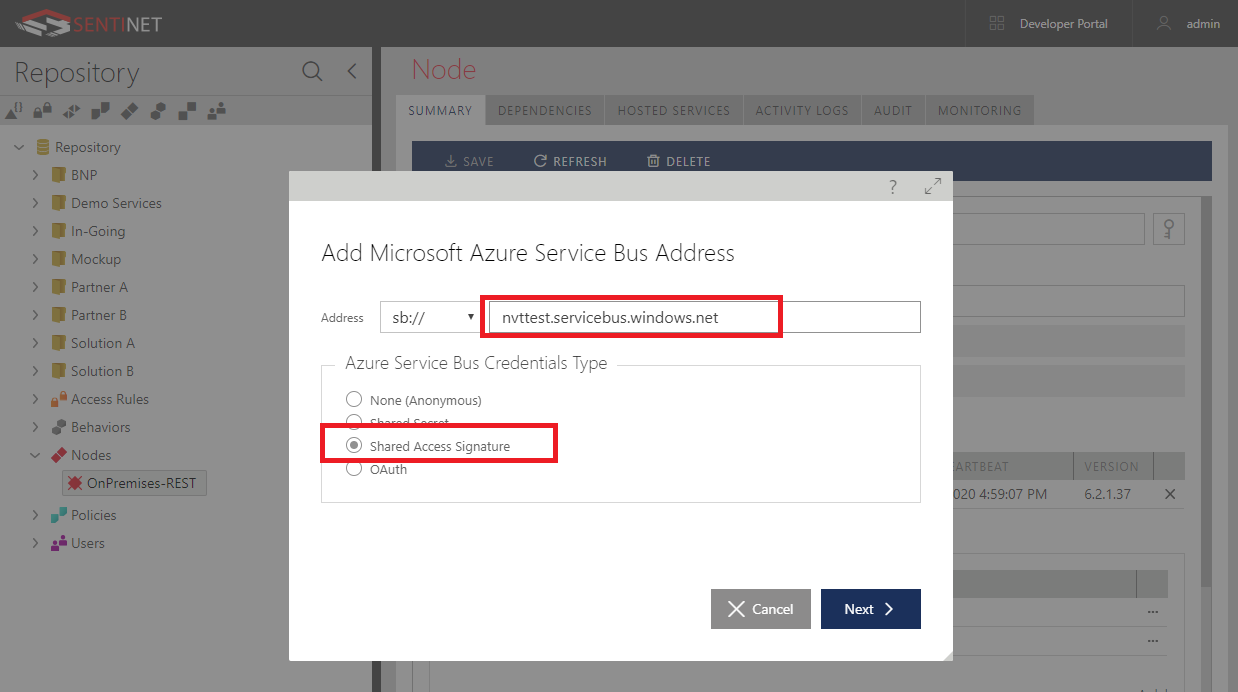
In the Sentinet Console you will enter the Azure Service Bus namespace to add sb://nvttest.servicebus.windows.net address to the known base addresses of a Sentinet Node (API Gateway). Notice, we add this address with the sb:// protocol, which is Microsoft’s private binary protocol best suited for native connections with Azure Service Bus. We also select the Shared Access Signature option to enable the Sentinet Node with future receivers of messages from the queues created in this Azure Service Bus namespace.
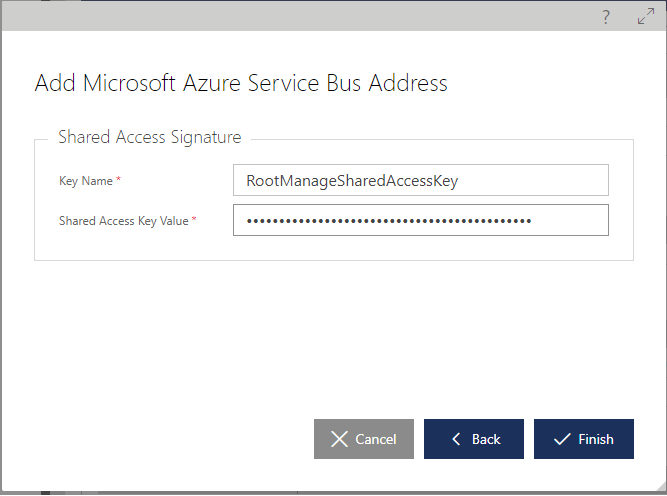
From that point you can create any number of virtual services (façade services) hosted in a Sentinet Node, which can receive messages from any Queue or Topics created in this Azure Service Bus namespace.
Create a queue in your Azure Service Bus namespace using all defaults, for simplicity. Name your queue so that it ends with .svc, as Sentinet will deal with these SOAP services through a native WCF activation that requires .svc extension in endpoint addresses.

You register a regular physical backend service in the Sentinet from its WSDL and design Virtual Receiver service hosted in the Sentinet Node using drag-and-drop User Interface. When you select the virtual service endpoint, use sb://nvtest.servicebus.windows.net/customersearchqueue.svc address for the endpoint and SOAP - SB_AZURE_QUEUES for its policy.
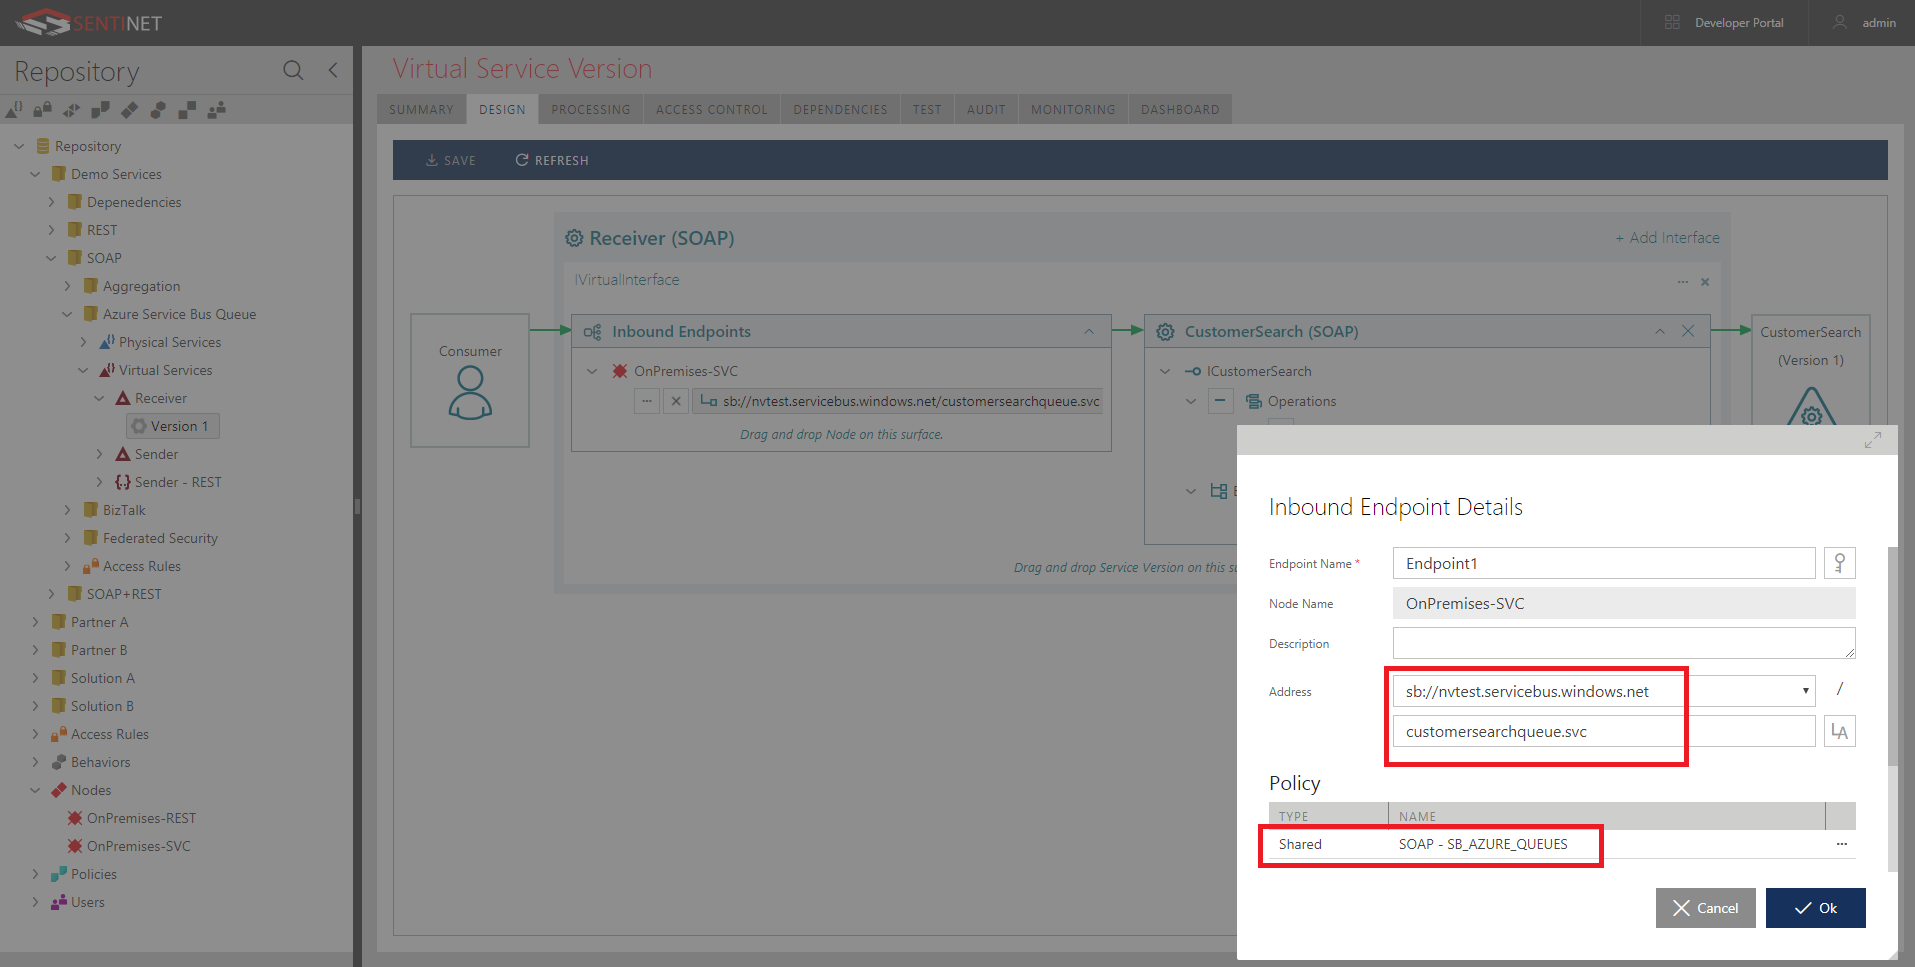
You do not have to configure anything else including security, because your Sentinet Node has already been configured with Shared Access Signature for that Azure Service Bus namespace.
Next, you design Virtual Sender service. You use the same drag-and-drop User Interface to virtualize Virtual Receiver service. In this case you do not need to define Service Bus endpoint, because it is known from Virtual Receiver service’s endpoint, but you have to define Shared Access Signature client identity. This will be the identity Virtual Sender will use to place message in the queue. This is all integrated into Sentinet API Management Portal:
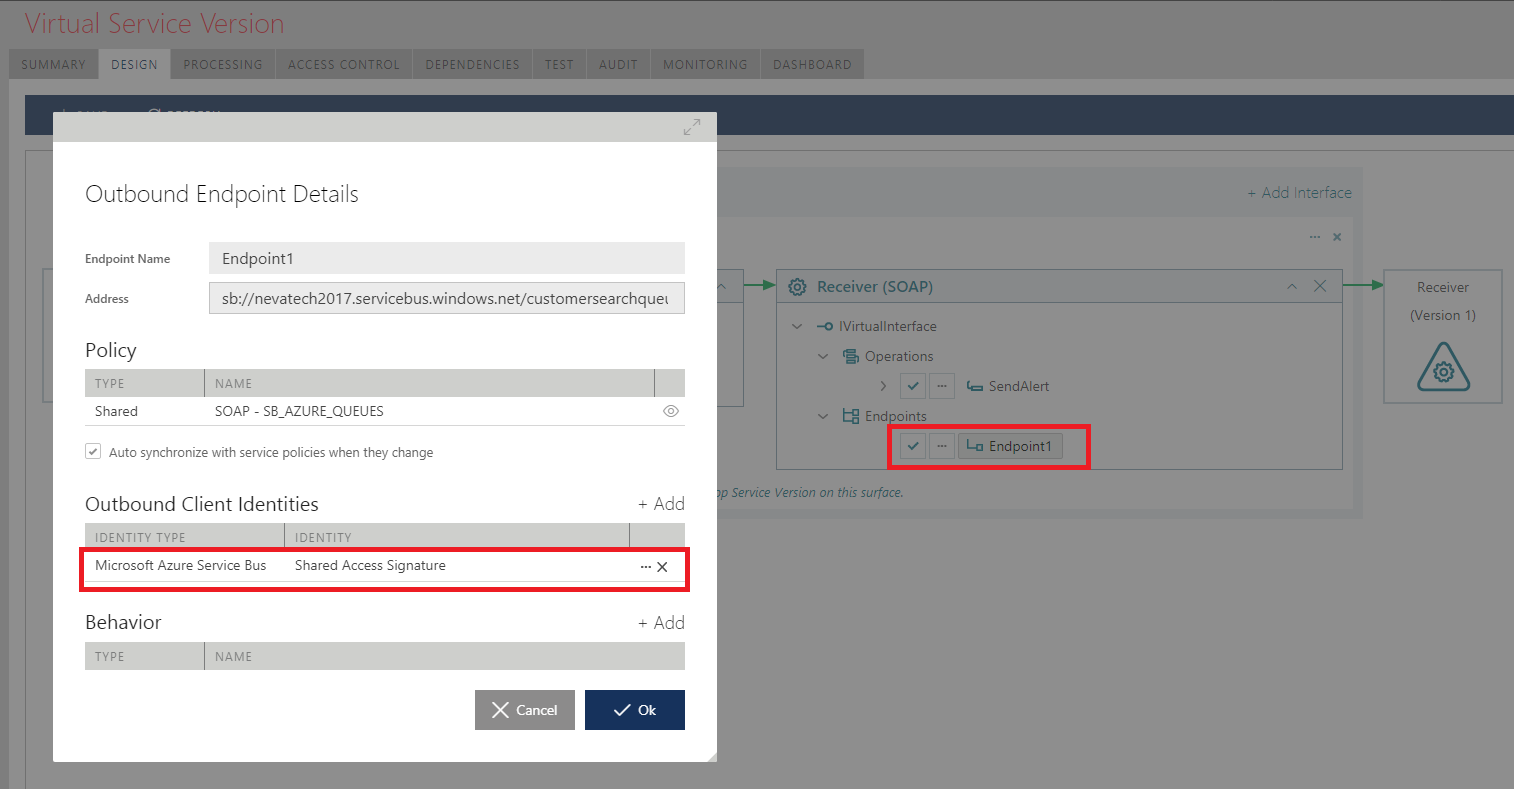
Now after just few clicks and entries in the Sentinet API Management Portal you have two virtual services that can natively send and receive messages to and from Azure Service Bus Queue.
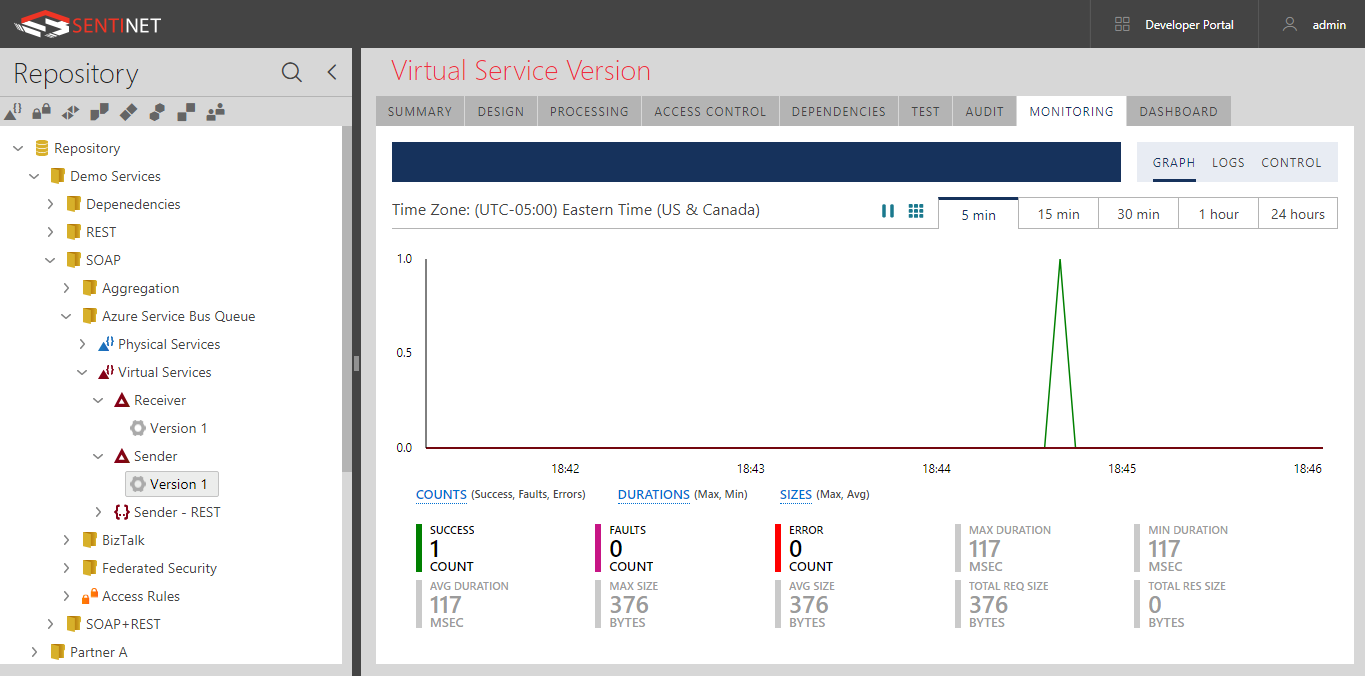
Using SOAPUI you can send a sample request message and see how it is delivered to the backend service. Detailed logging and tracing are also available out-of-the-box.
You can temporarily disable Virtual Receiver service:
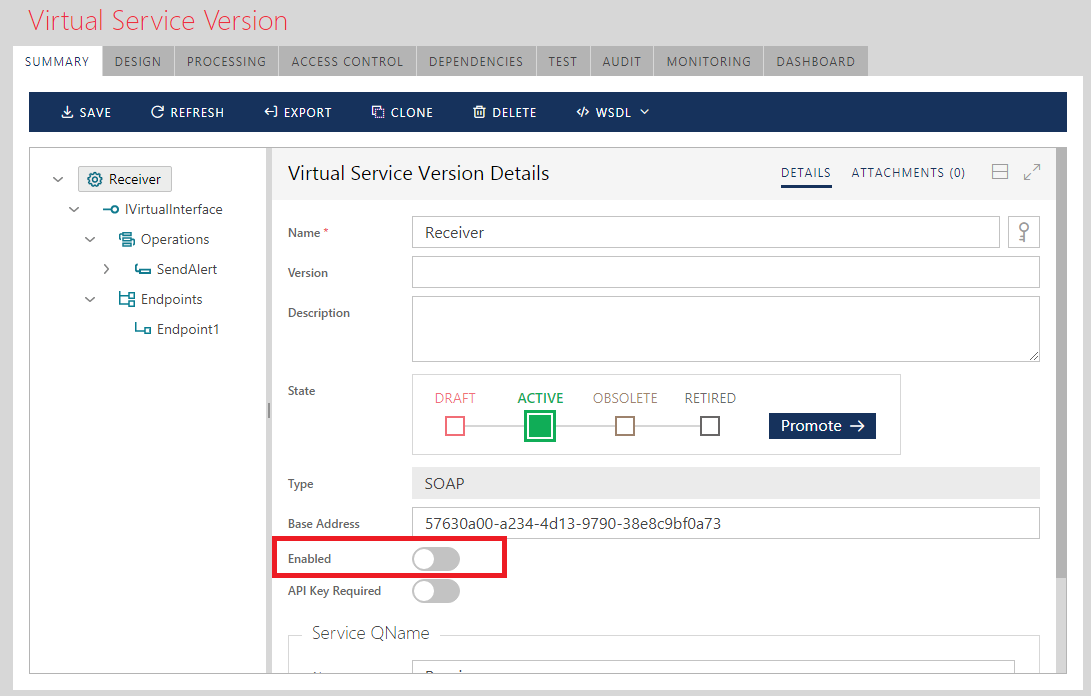
In this case new messages will be stuck in the queue, because Virtual Receiver service is not available and not picking them up. But as soon as you re-enable Virtual Receiver service, messages will be delivered all the way to the physical (backend) service. This test proves asynchronous delivery of messages via Azure Service Bus messaging.
Conclusion
API Management can be used with Azure Service Bus messaging, while delivering valuable add-on benefits. This article does not cover REST Client and REST API use case scenario, but this can be implemented in Sentinet too.