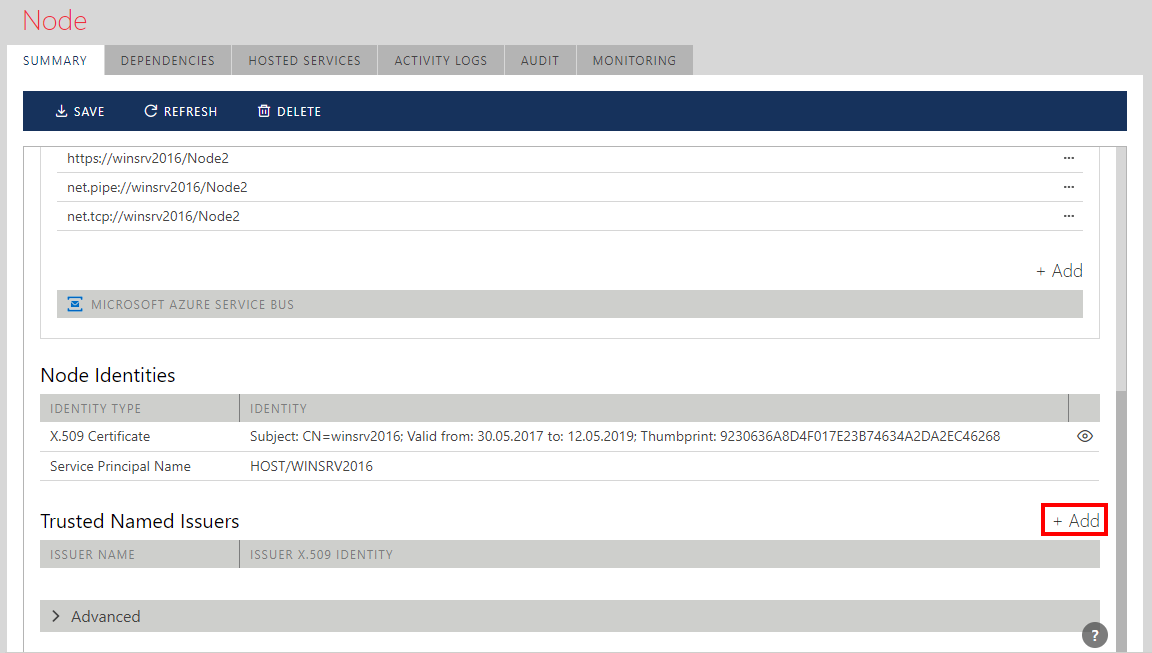
Trusted Named Issuers
Access to the Sentinet virtual services may be managed by the Access Rules (see Access Rules and Access Control chapters in this guide) that require validation of the security tokens issued by external Trusted Issuers (or Trusted Authorities). For example, an external Security Token Service may generate SAML tokens signed by its token-signing certificate. These SAML tokens are later sent to the Sentinet virtual services by the client applications. A Sentinet Access Rule expression might be configured to validate both token issuer and token claims. By default, SAML token issuers are identified by the thumbprint of their signing certificate. Sentinet Claims Access Rule Expression may be configured with this thumbprint value, but in many cases humanly readable Issuer Name aliases are preferred over the digital thumbprint values. Windows Identity Foundation provides configuration sections to define named trusted issuers in its <trustedIssuers> section, https://msdn.microsoft.com/en-us/library/hh568670.aspx. Sentinet fully supports these configurations and Sentinet Node's web.config file can be configured with this section, for example:
<trustedIssuers>
  <add name="My STS"
      thumbprint="20139F2D80D1493ECDC5E66ED712F1723FEA7701" />
</trustedIssuers>
When <trustedIssuers> section is configured with named trusted issuers, the name attribute value will be used to generate claim issuer's name claim. That name value can be then used in the Sentinet Claim Access Rule Expression instead of the digital thumbprint value.
Sentinet further simplifies configuration of the Named Trusted Issuers and provides a User Interface to configure them remotely from the Sentinet Administrative Console. The latter approach eliminates the need to modify Sentinet Node's web.config file manually and allows management of the Trusted Issuers dynamically and remotely.
To add Trusted Named Issuer to a Sentinet Node click + Add button.
In the Add Trusted Issuer Identity dialog box provide Issuer Name (user friendly issuer name) and select the option of how the Issuer certificate will be provided:
Specify certificate thumbprint
Upload public part of the certificate.
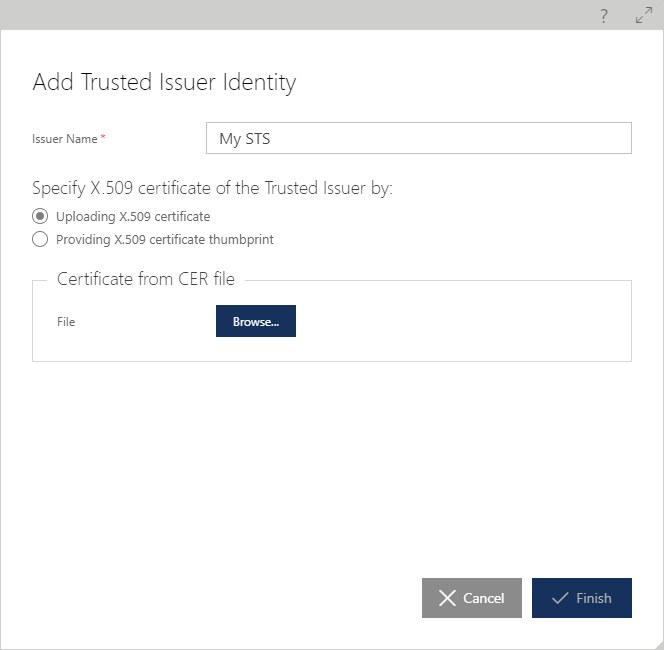
There is no significant difference between the two options. Some STS servers do not provide complete public part of their signing certificates, so option 1 might be the only option. On the other hand, and from a Governance perspective, it is always advisable to provide complete public part of the certificate (when it is available), so that the Sentinet Repository can be used to retrieve this certificate at any time and to monitor its expiration.
