Registering REST APIs
REST services can be described with standard metadata formats such as OpenAPI Specification (aka Swagger). Sentinet fully supports registration of the REST APIs from the existing Swagger documents.
This tutorial intentionally demonstrates “manual” registration of a REST API when its Swagger document is not available at the time of API registration.
Regardless of how the REST API was registered in Sentinet, with an existing Swagger document or manually, the API’s Swagger document will always be available for download from the Sentinet Console after registration is complete. Sentinet users often manually register REST APIs while these APIs are still in the design and development stage, which helps developers provide continuously managed and updated REST API Swagger documentation.
Note
Try some publicly available Swagger documents to register API(s) in the Sentinet Repository. For example, you can use the following page, https://apis.guru/browse-apis/ which lists a few hundred of different APIs from different vendors. Find an API on this page that you would like to register, right click on its json or yaml button and select to copy link or a shortcut. Use this link to Swagger document to register an API from the Sentinet Console.
Open a browser and navigate to the Repository Web Application's address (example: https://[machine]/Sentinet). Login and select the Repository root element (or any other folder that you may create for this scenario) in the Repository view panel. Right-click on the Repository root element and select the Add->Service->REST menu option (you may also create your own sub-folder in the Repository and start this tutorial by registering services and APIs in your own folder).
In the Add Service Dialog box select Do not import service metadata option and enter Order Service API in the Service Name field. Keep Create service version checked to create (to register) first service version along with the service itself.
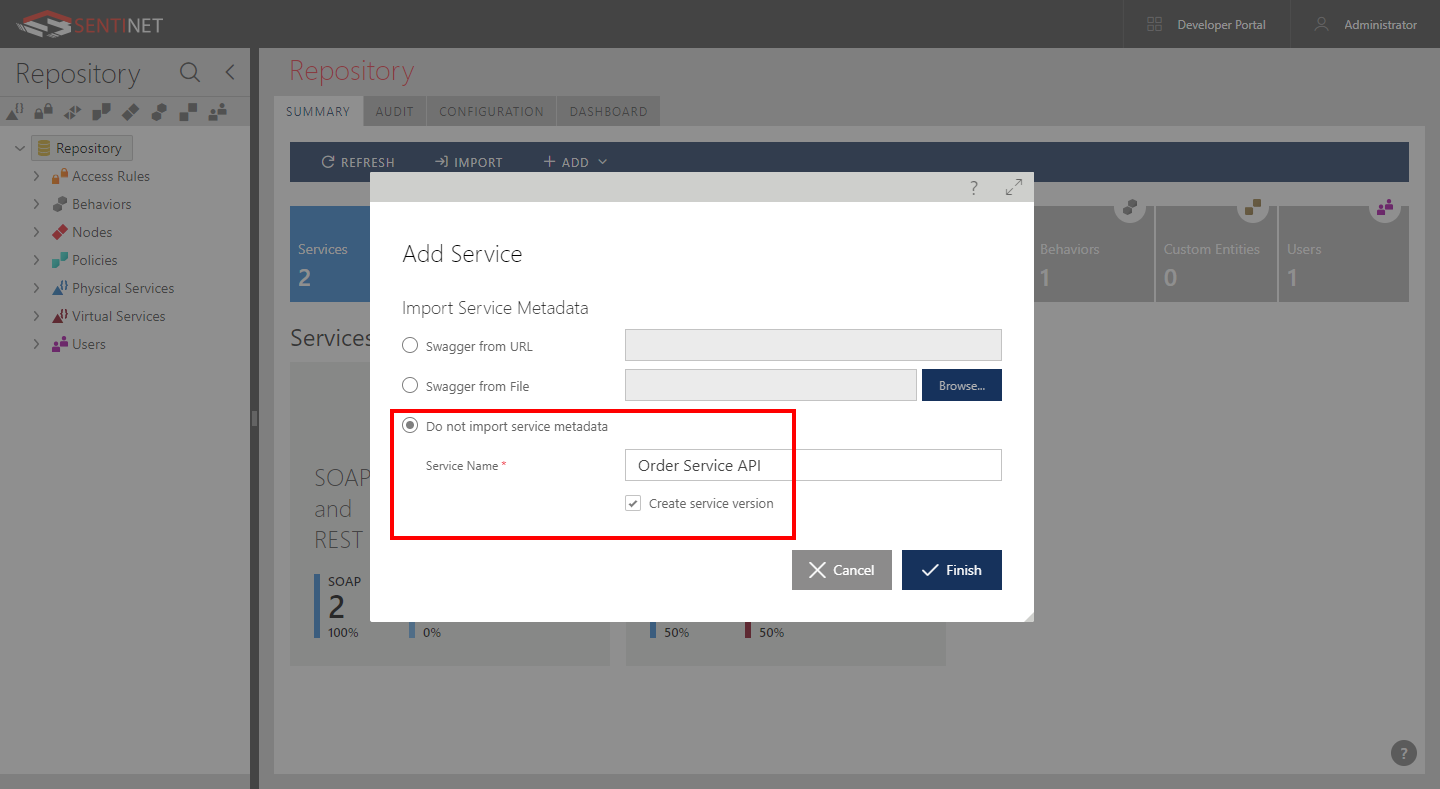
Click Finish button to create new service and its first service version.
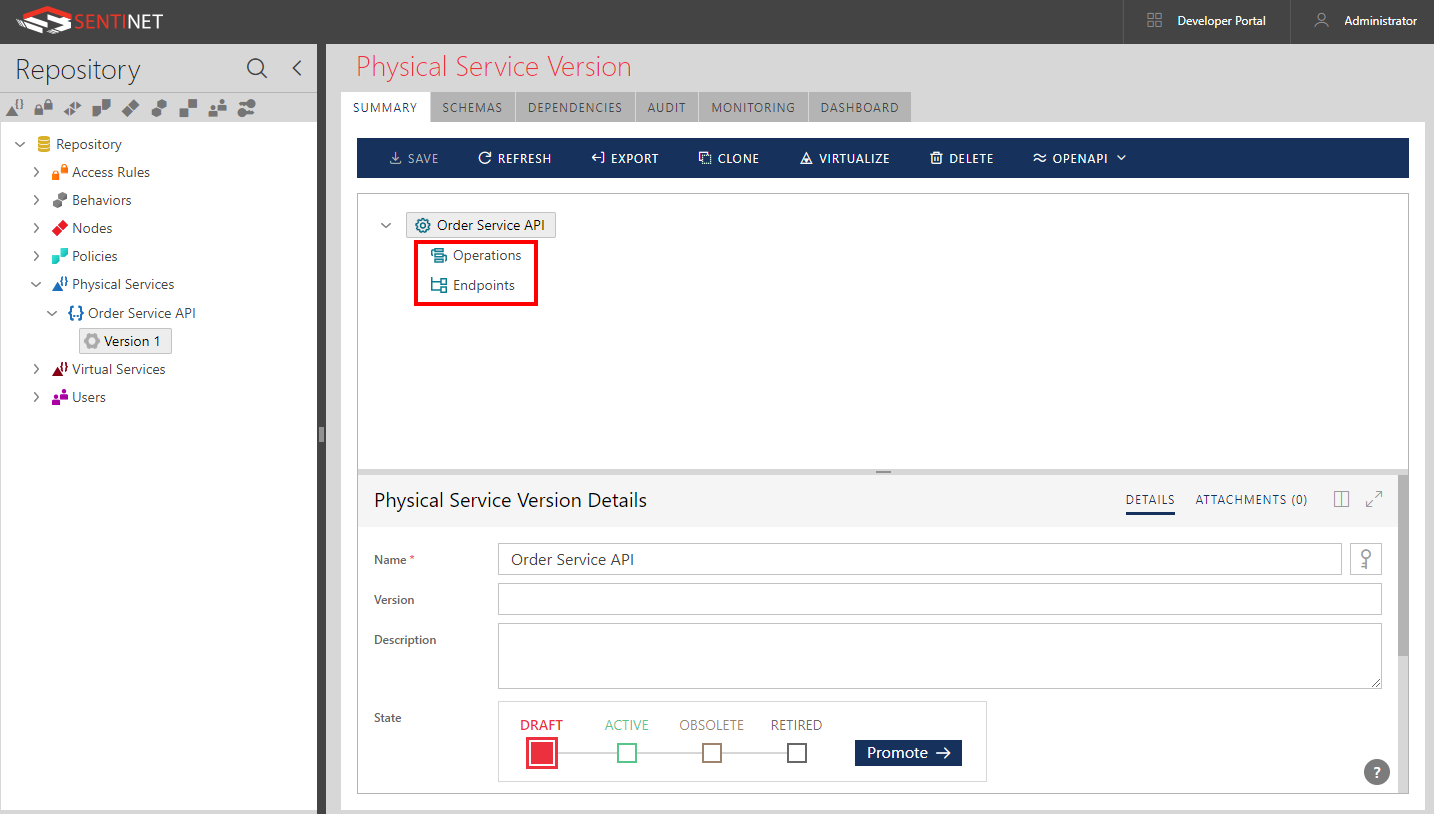
Notice that service version tree element in the SUMMARY view now shows empty Operations and Endpoints elements. This is where we can start describing Order Service API with the actual endpoint(s) and operation(s).
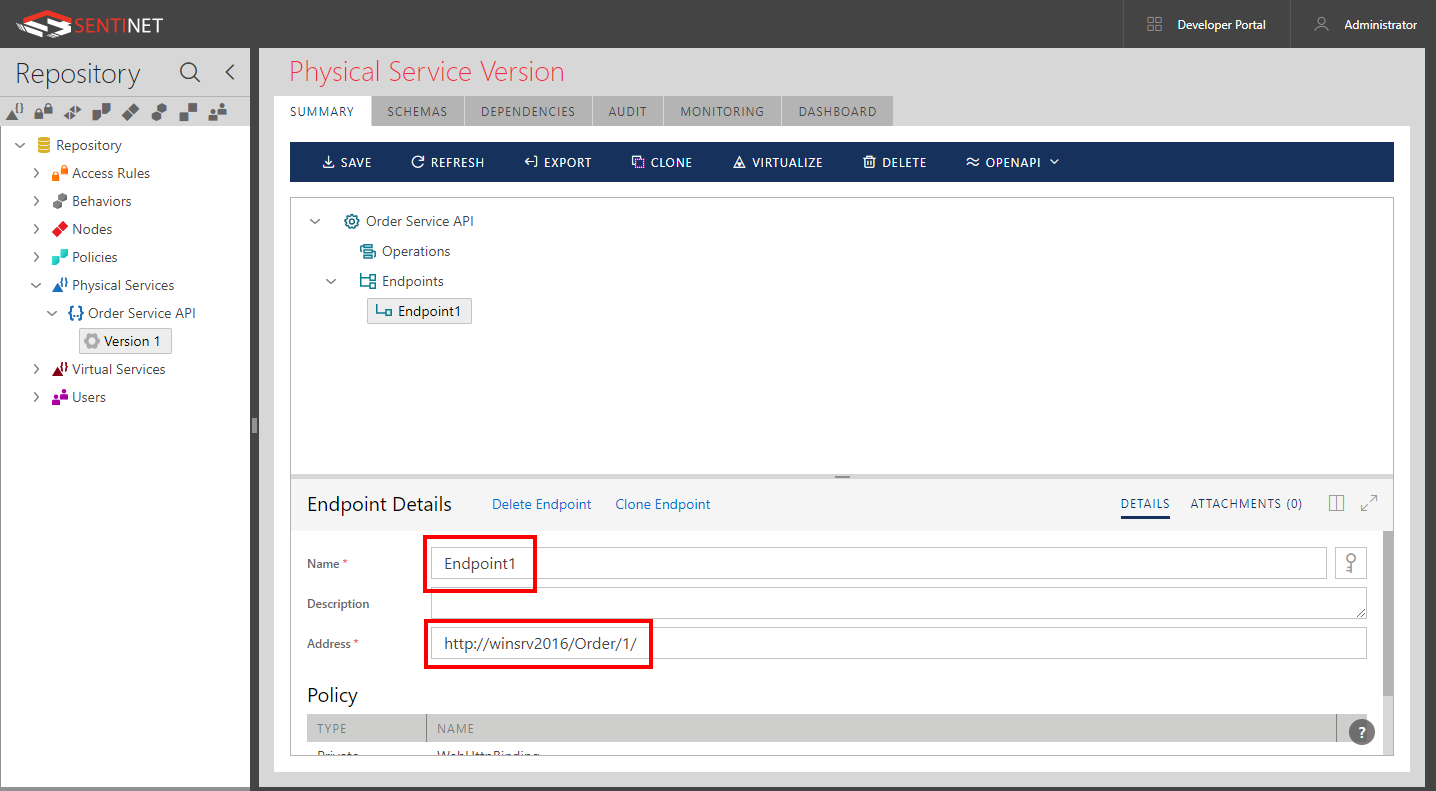
Right-click on the Endpoints element and select Add Endpoint menu option.
An API endpoint is an address that is common to all API operations. Later we will see how operations' Uri templates are added to an endpoint address to completely describe the URL syntax of each individual operation.
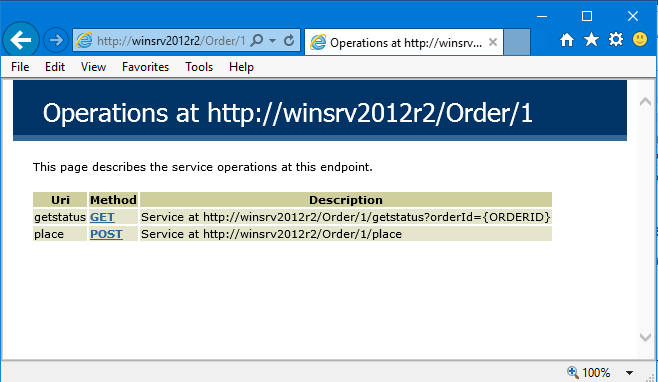
As described by the help of the Order Service API's shown below, the common part of the addresses of this API operations is http://winsrv2012r2/Order/1 and that is also the endpoint address that the sample demo application was started with.
Enter http://winsrv2012r2/Order/1 address in the Address field. You can rename default endpoint Name to give it a user-friendly name or leave the default Endpoint1 name.
By default, Sentinet configures every new endpoint of the REST physical service version with the private policy called REST - HTTP, which represents a basic HTTP communication with no transport-level SSL/TLS security. During this step of manually registering physical service version, you can change policy (if needed) to match what physical service requires. Sentinet User Guide, Policies chapter describes the concepts of private and shared policies in more details.
Note
Sentinet supports all standard security policies and authentication schemes, such as Basic Authentication, mutual X.509 certificates, Kerberos, NTLM, OAuth/OpenID Connect and custom authentication models including API Keys.
For example, to register an API with a HTTPS endpoint, change default REST - HTTP policy to require transport-level security. To change the policy can click […] button (a Modify policy button) located on the right side of the Policy line, next to the REST - HTTP NAME. Keep selected Private policy option. Click Next button and change Transport Scheme drop-down from HTTP to HTTPS. Rename Policy to reflect HTTPS protocol, for example REST - HTTP. Click Finish button.
Note, that after this specific policy change, you will also have to change registered endpoint’s address to https://winsrv2012r2/Order/1. Note that provided with tutorial sample API does not support HTTPS, so we will not make this policy change in this tutorial.
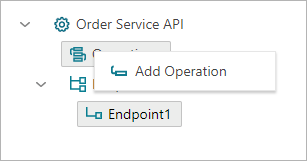
Right-click on the Operations element and select Add Operation menu option.
Note
Sentinet allows flexible interpretation of what actually can be a REST service operation. It can be a resource associated with an HTTP verb like GET, POST, DELETE, etc., or it can be a logical operation that is described by its Uri template and other REST parameters.
This tutorial uses a very simple approach when Order Service API is described with two simple GET and POST operations. Sentinet provides options to describe every detail of the REST API including the JSON schemas of the request and response messages.
For complete documentation on how to add and describe REST API operations, please refer to the Sentinet User Guide.
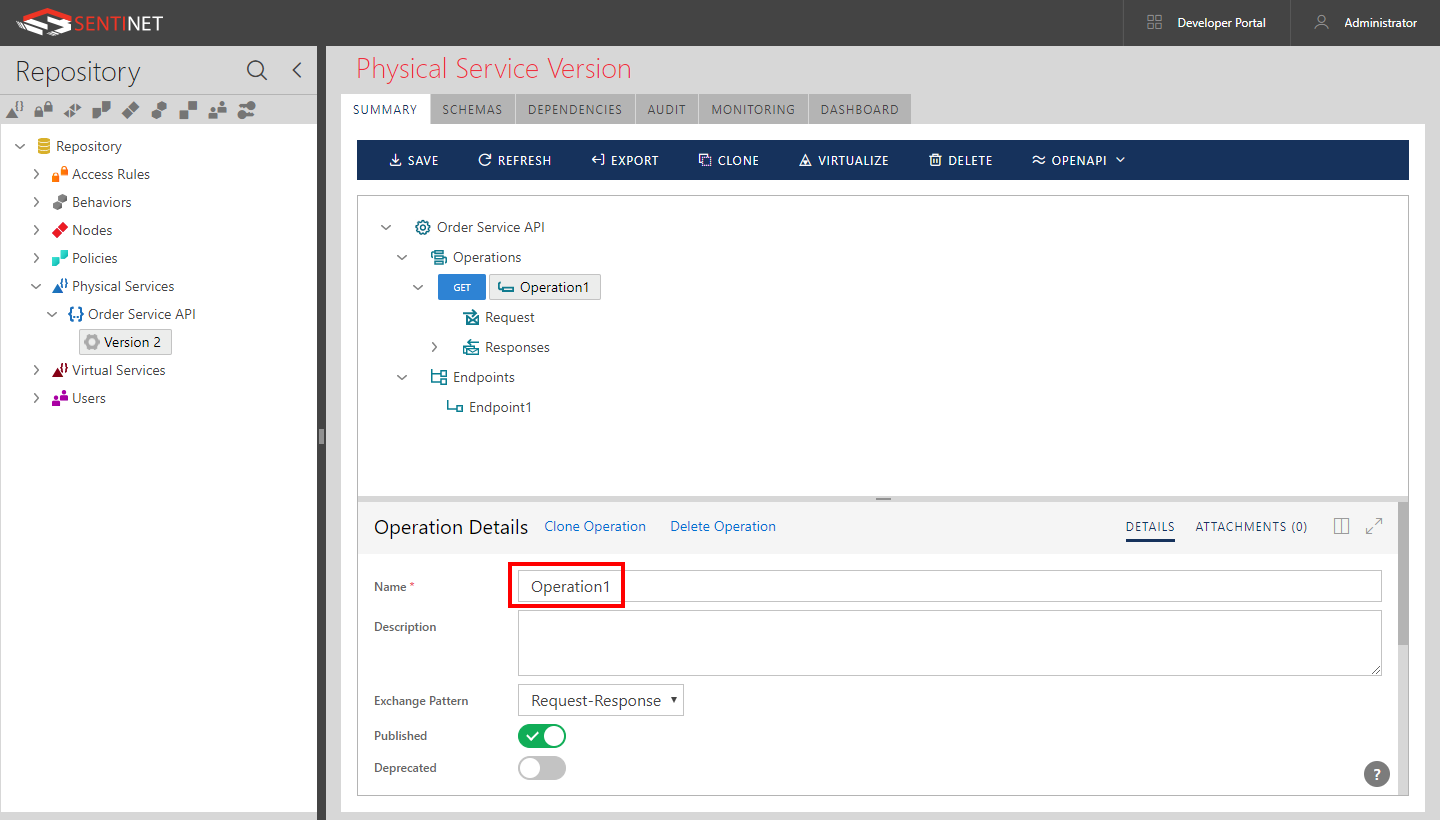
New operation with default name Operation1 will be added. Change its name to GetStatus. Note that operation name is just a user-friendly identifier that ultimately helps to generate Swagger documentation in a readable format, and to easier track future message exchanges through the REST API by the operation's user-friendly name. How API consumer applications call an API operation does not depend on how this operation is named in the Sentinet.
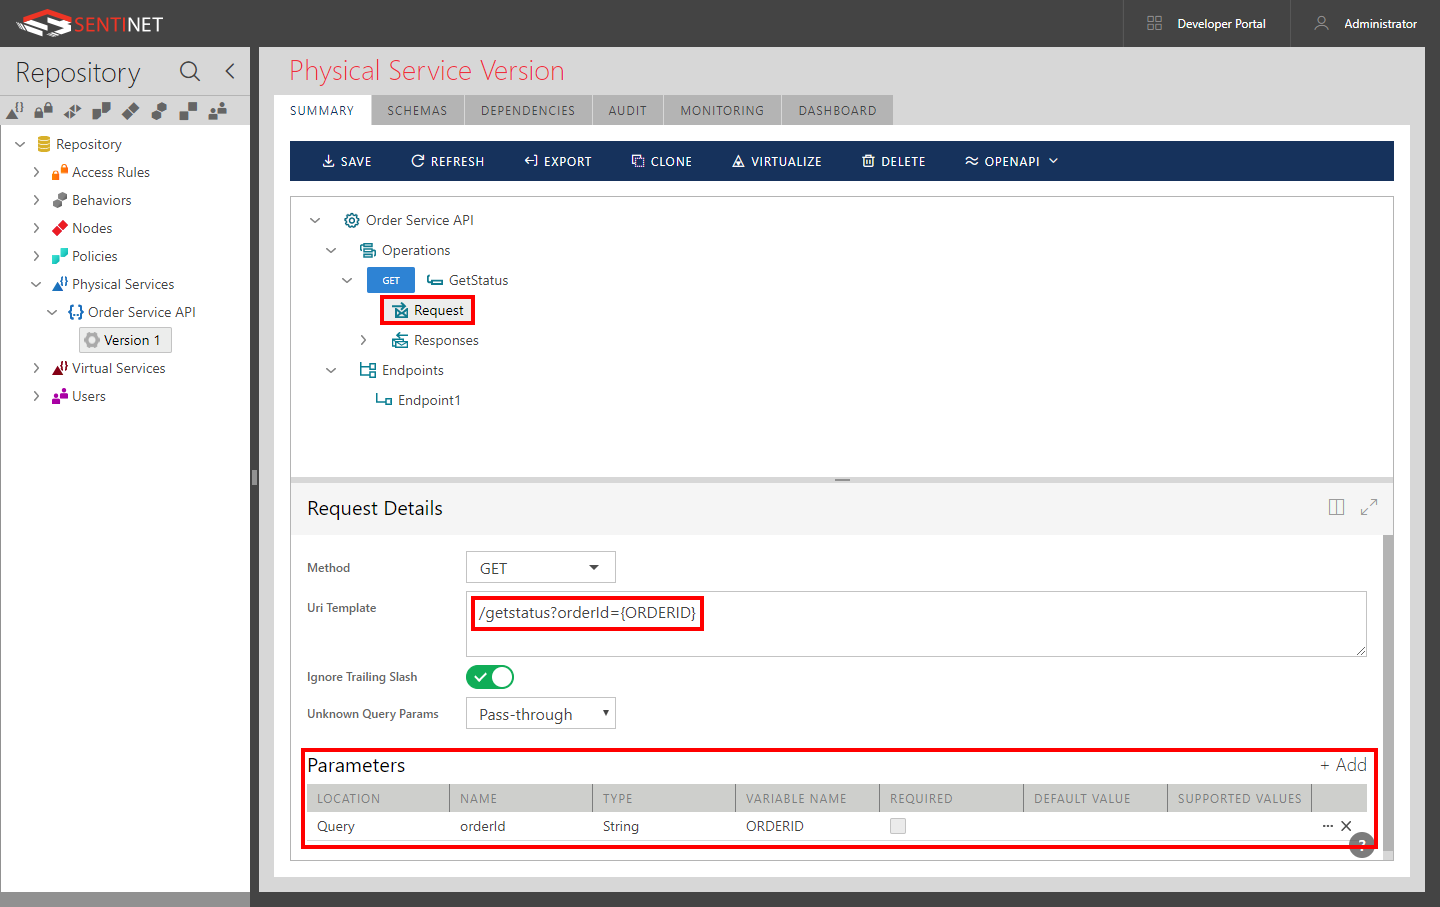
Expand GetStatus operation tree element by clicking ">" next to the tree element and select operation's Request tree item. Sentinet describes a REST API operation by the syntax of its Request message. Each REST API operation has to have unique Request message syntax to distinguish operations from each other. Sentinet requires Request message syntax to define a unique combination of HTTP method, Uri template and required HTTP headers. In this tutorial, we will describe GetStatus operation according to its description on its API's help page:
/getstatus?orderId={ORDERID}
Variable {ORDERID} in curly brackets {} in this Request message syntax represent values of the Query Parameter that will be found in the actual message exchanges at run-time.
Enter Uri template above in the Uri Template field. As soon as you change focus from the Uri Template field, the Parameters table will automatically be populated with orderId as a query parameter. When registering physical APIs manually, you can add additional REST API parameters to this table including those that cannot be described by the Uri Template field alone (for example HTTP Headers).
Note
Uri Template describes operation’s Request by its “endpoint address independent” part, which means that Uri template represents a relative address that will be appended to the API endpoint address created earlier in this tutorial.
Uri Template may include constants, variables, masks, default and supported values, and other properties. Sentinet allows flexible and powerful syntax for Uri Template field. The syntax is fully compliant with Microsoft UriTemplate syntax, http://msdn.microsoft.com/en-us/library/system.uritemplate.aspx.
For complete documentation on the Uri Templates please refer to the Sentinet User Guide.
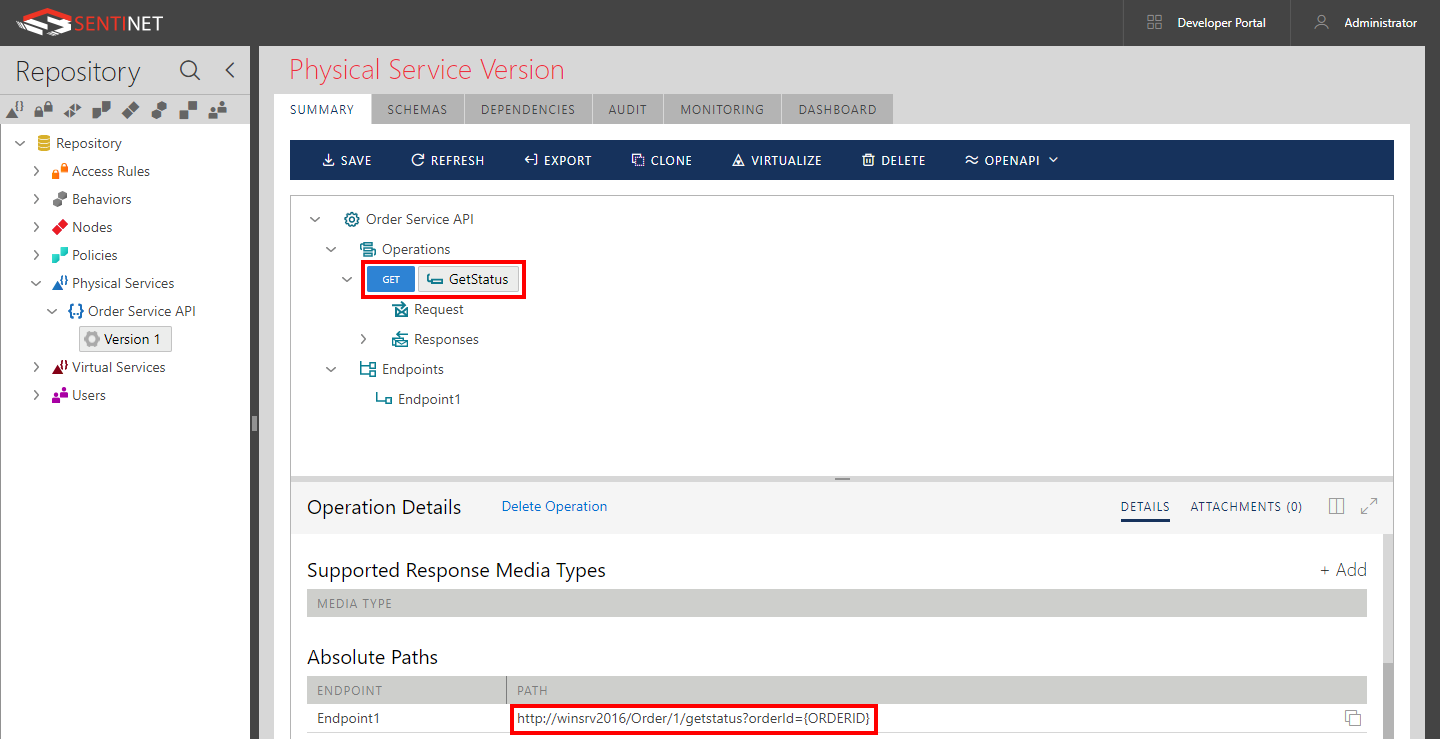
Note that if you now select GetStatus operation tree element, you will see Absolute Paths populated with full parameterized addresses of the GetStatus operation (you see only one address in this case because we registered API with only one endpoint).
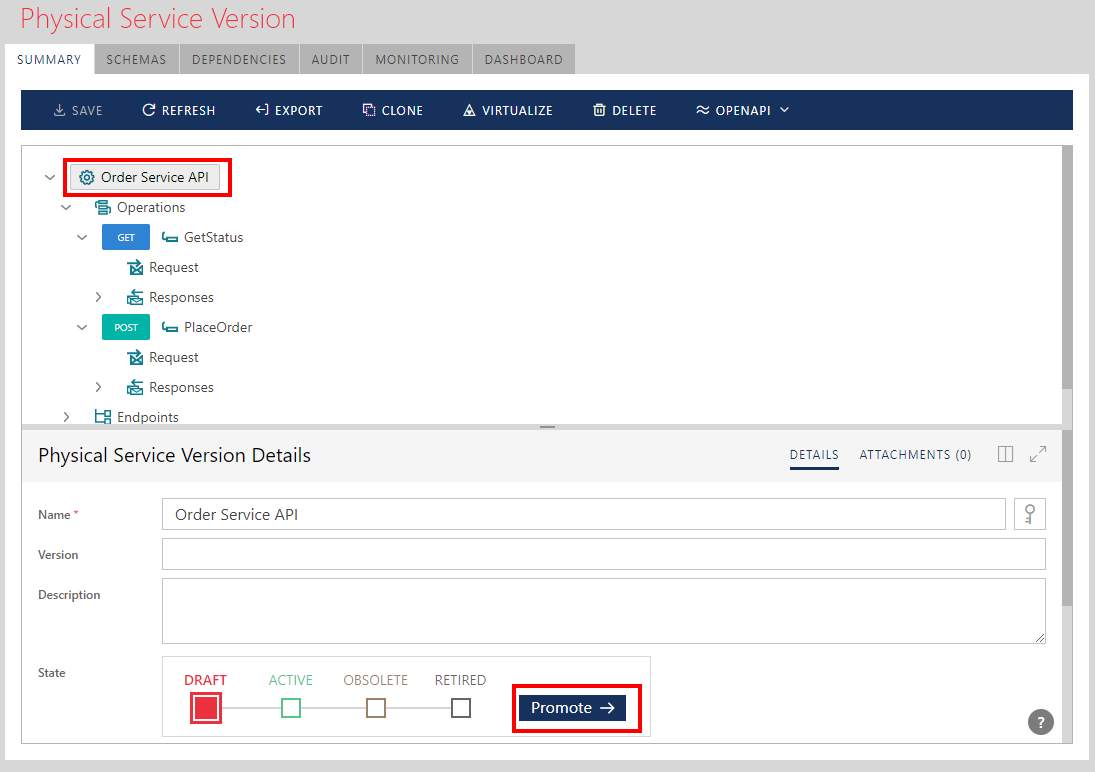
Add another operation to Order Service API called PlaceOrder. This time the Uri Template will be just /place and the HTTP Method will be POST.

Now select service version root element and click the Promote button to promote the service to an Active state.
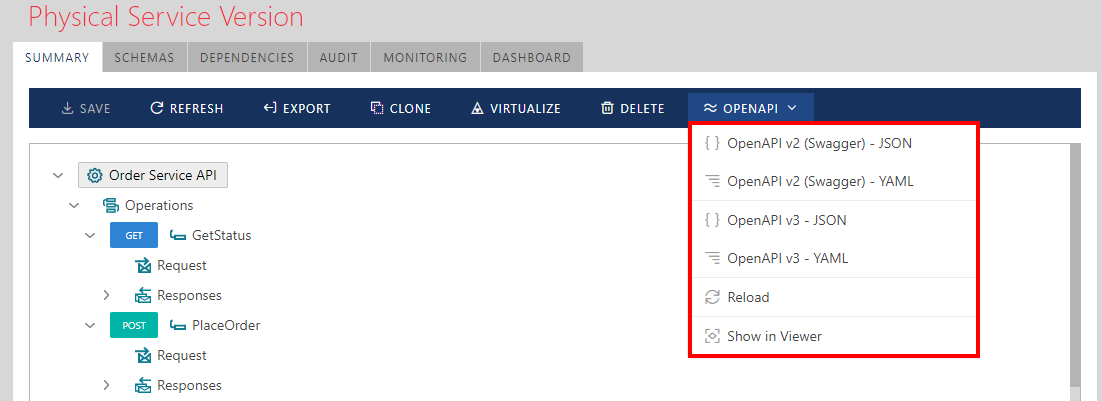
Order Service API is now registered in the Sentinet Repository in its Active state and can now be virtualized through the Sentinet Node(s). Note that you can now request the Sentinet Console to produce a Swagger document that describes this API in the industry standard Swagger formats. The Swagger document can be retrieved in either JSON (OpenAPI v2(Swagger) or OpenAPI v3), or YAML (OpenAPI v2(Swagger) and OpenAPI v3) format (in this tutorial we provided only minimum information about our REST API. Sentinet can be configured with everything that Swagger supports). You can also see Swagger in a user friendly external viewer. By default, Sentinet uses a local copy of the customized open source Swagger UI tool for OpenAPI v3. Sentinet can be configured with any other third party or custom external viewer.