Designing Virtual REST APIs
First, we will create new Virtual Service (which will serve as a container for all its possible service versions) along with its first service version.
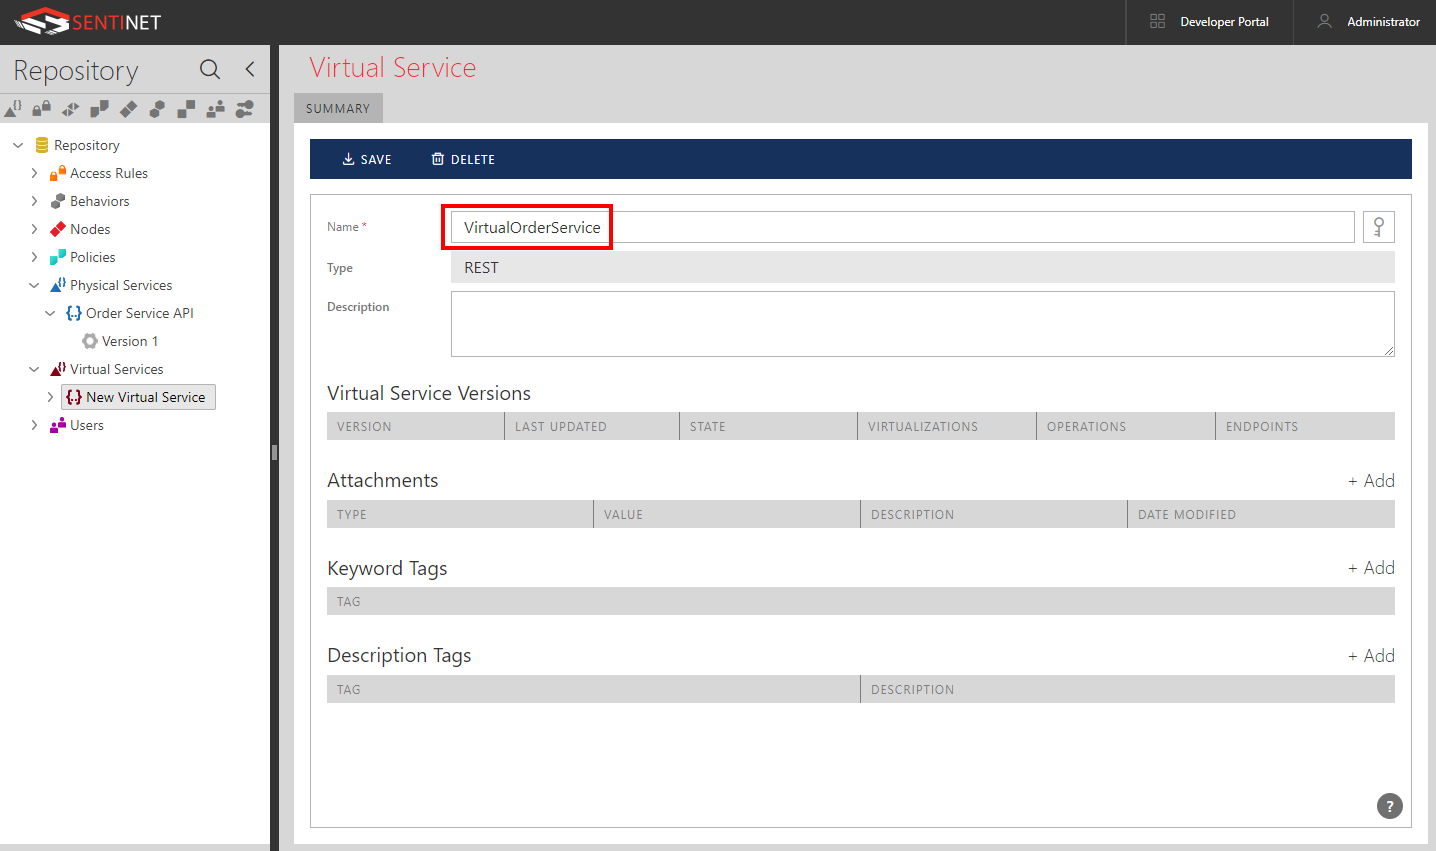
Select the Repository root element in the Repository view panel. Right-click on the Repository root element and select the Add->Virtual Service->REST menu option. Change the service name to VirtualOrderService and click SAVE toolbar button.
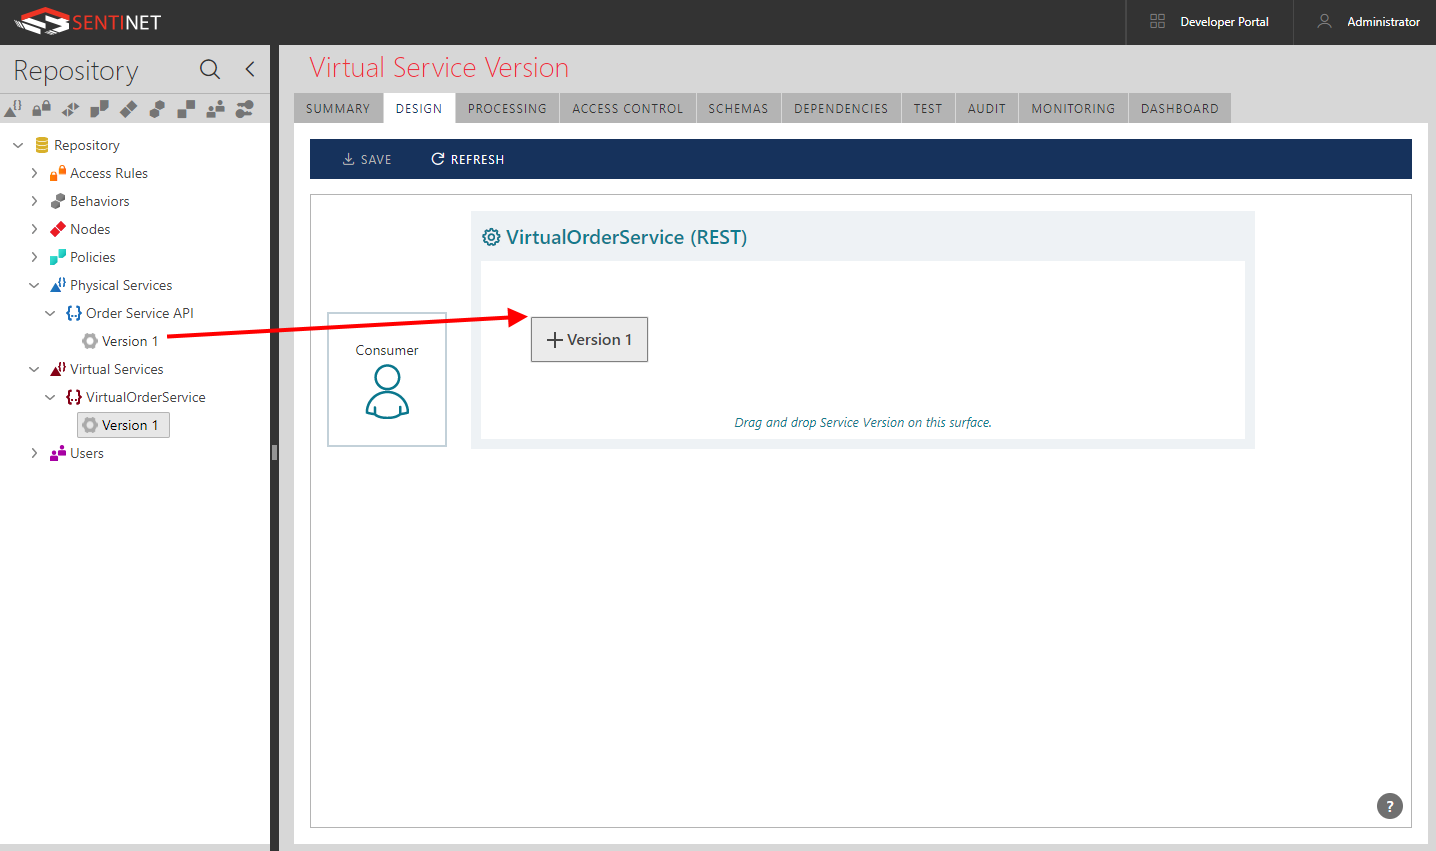
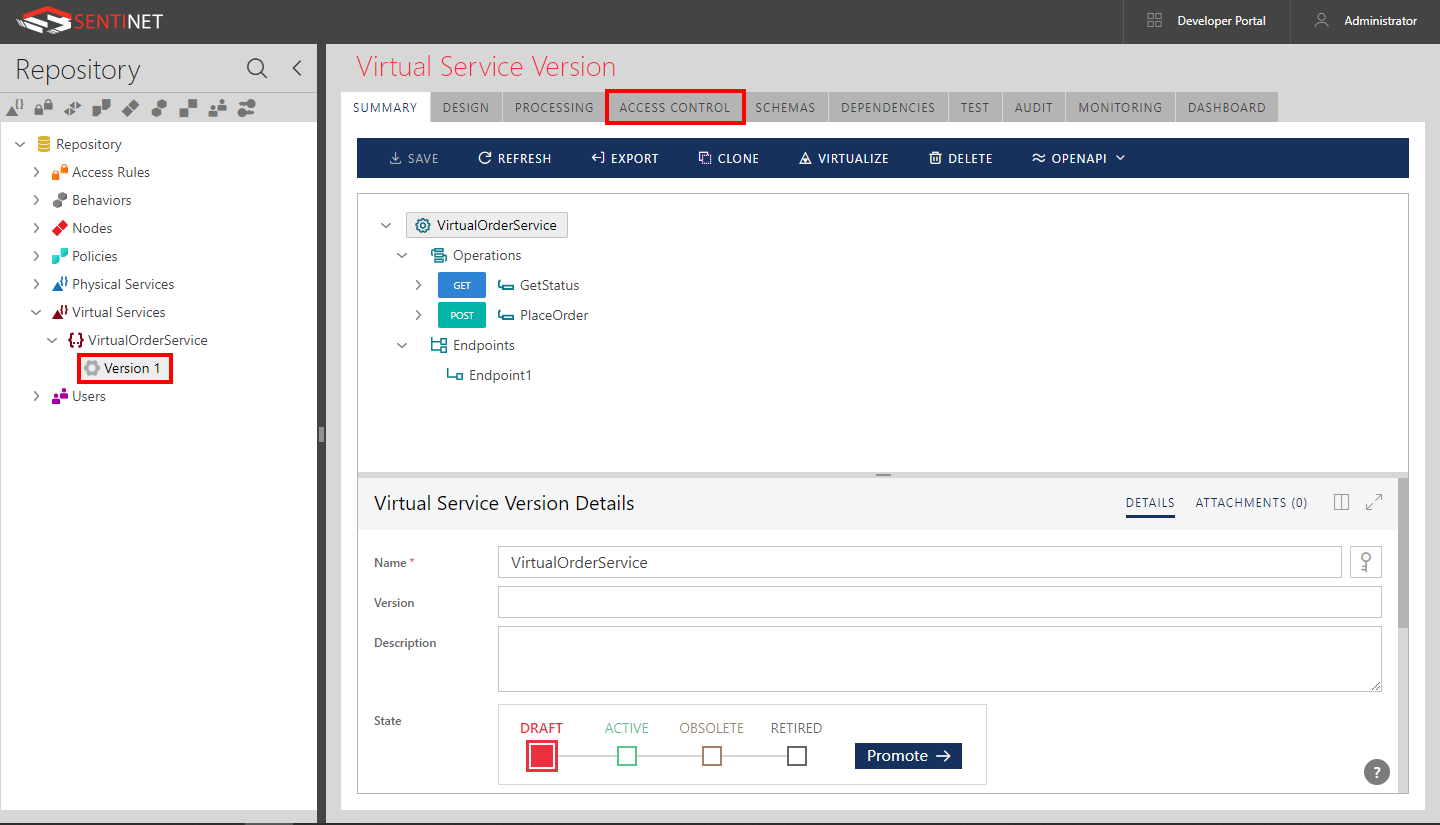
The first version of an empty virtual service is created. At this point the service is not virtualizing any physical service (physical API). A virtualization structure needs to be designed. Click the DESIGN tab to show the Virtual Service Design surface. In Design View drag-and-drop Version 1 of the Order Service API on the design surface of the virtual VirtualOrderService service. This creates VirtualOrderService as an API that virtualizes backend API, Order Service API.
Now we need to create inbound endpoint for the virtual service (you can create more than one endpoint in this process). Drag-and-drop New Node on the inbound endpoint surface to indicate that New Node will be the one that will host new virtual service version.

Keep the drop-down Address field with auto-generated default HTTP address (you can also change the drop-down address to be HTTPS, which we will not cover in this tutorial). Click +Add button to add Policy to the inbound endpoint.
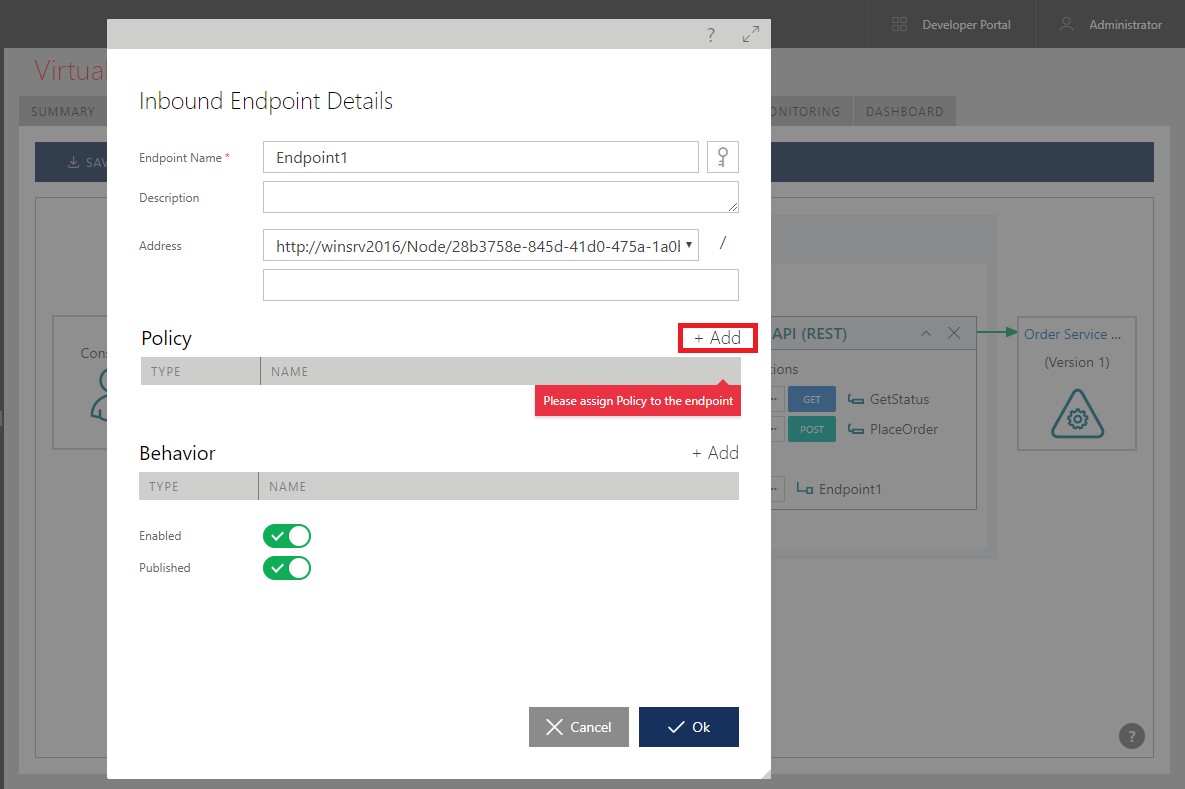
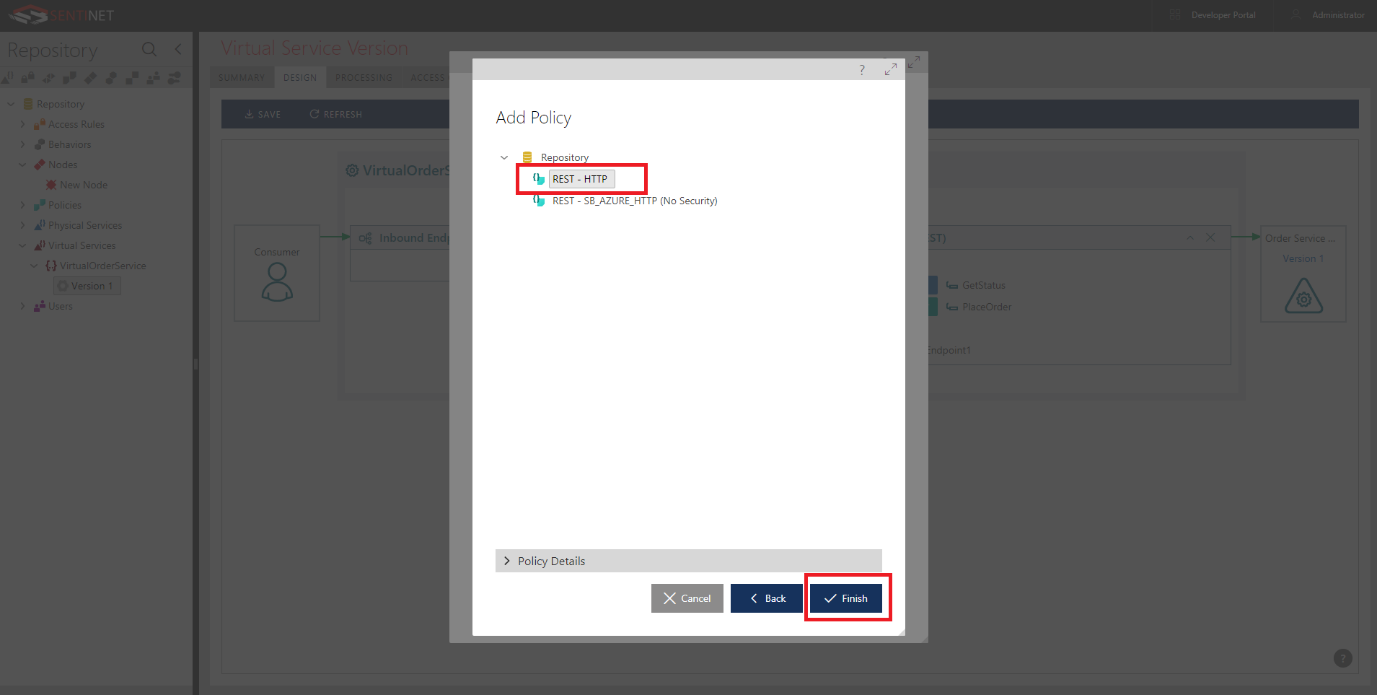
In this case, we will add simple policy that does not require any standard security. Follow Add Policy wizard to select REST – HTTP policy from the Shared policies. Click Finish button once the policy is selected.
This will assign policy to the inbound virtual service’s endpoint (the endpoint that will be facing API client applications). In real-life scenarios, all API endpoints are recommended to be secured with HTTPS transport with the policy that includes authentication of API calls.

Click Ok to accept changes in the Inbound Endpoint Details dialog box above, and then click SAVE button on the toolbar to save your virtual service designed structure.
Now we will have to assign an Access Control rule that controls access to the virtual service. Without explicit Access Control, Sentinet will not allow access to the virtual service resulting in automatic Access Denied error with HTTP 403 status code.
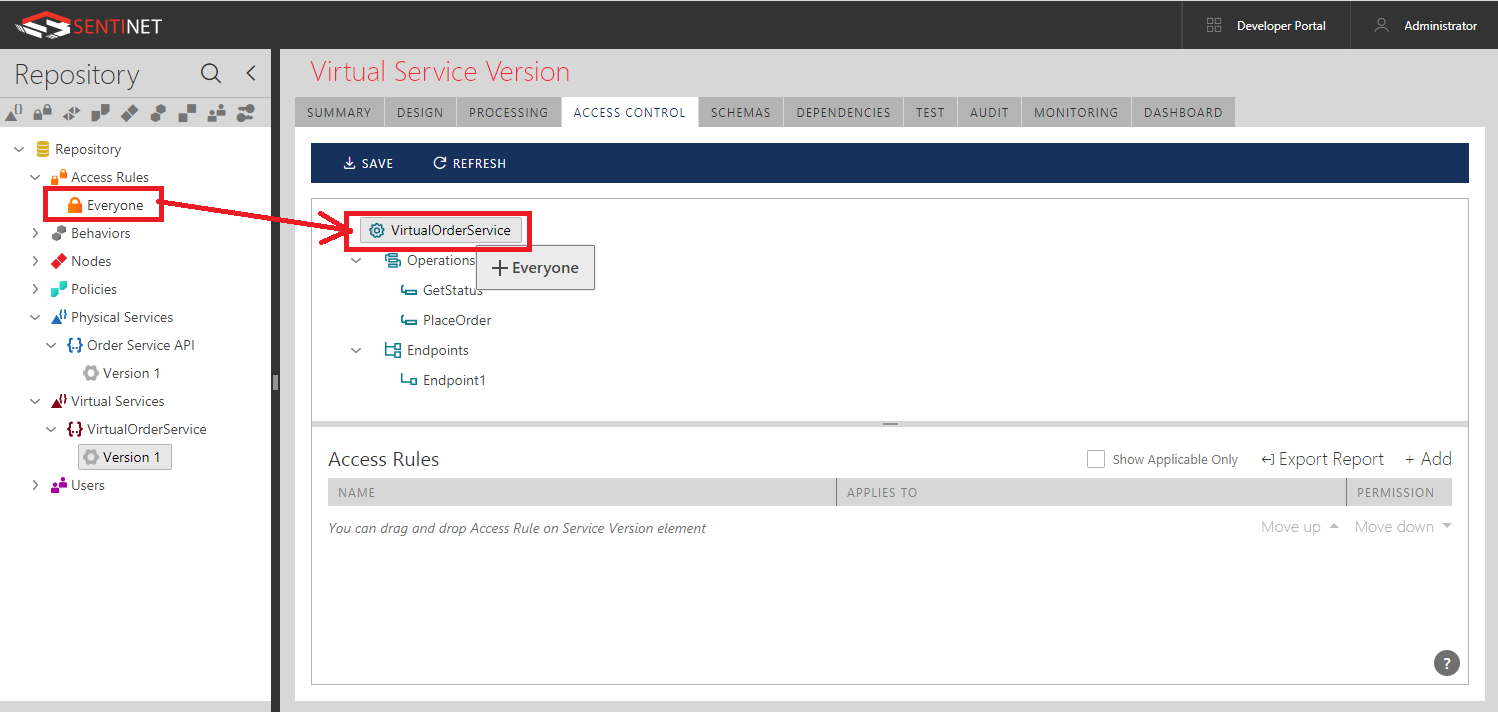
Access Rules are created using Sentinet graphical Access Rule Designer. Sentinet User Guide, Access Rules and Access Control chapter provides detailed description of all available options for creating and managing Access Rules. In this tutorial we will use the default, built-in Everyone Access Rule, which allows all authenticated and anonymous calls to be accepted by the virtual service. Expand the Access Rules folder in the Repository view. Drag-and-drop the Everyone Access Rule on the root of the Virtual Service tree.
Select virtual service version tree element and click its ACCESS CONTROL tab.
Expand Access Rules tree element and drag-and-drop Everyone element onto VirtualOrderService tree root element.
Note that now Everyone Access Rule is assigned to the whole VirtualOrderService service with resulting permission Permit.
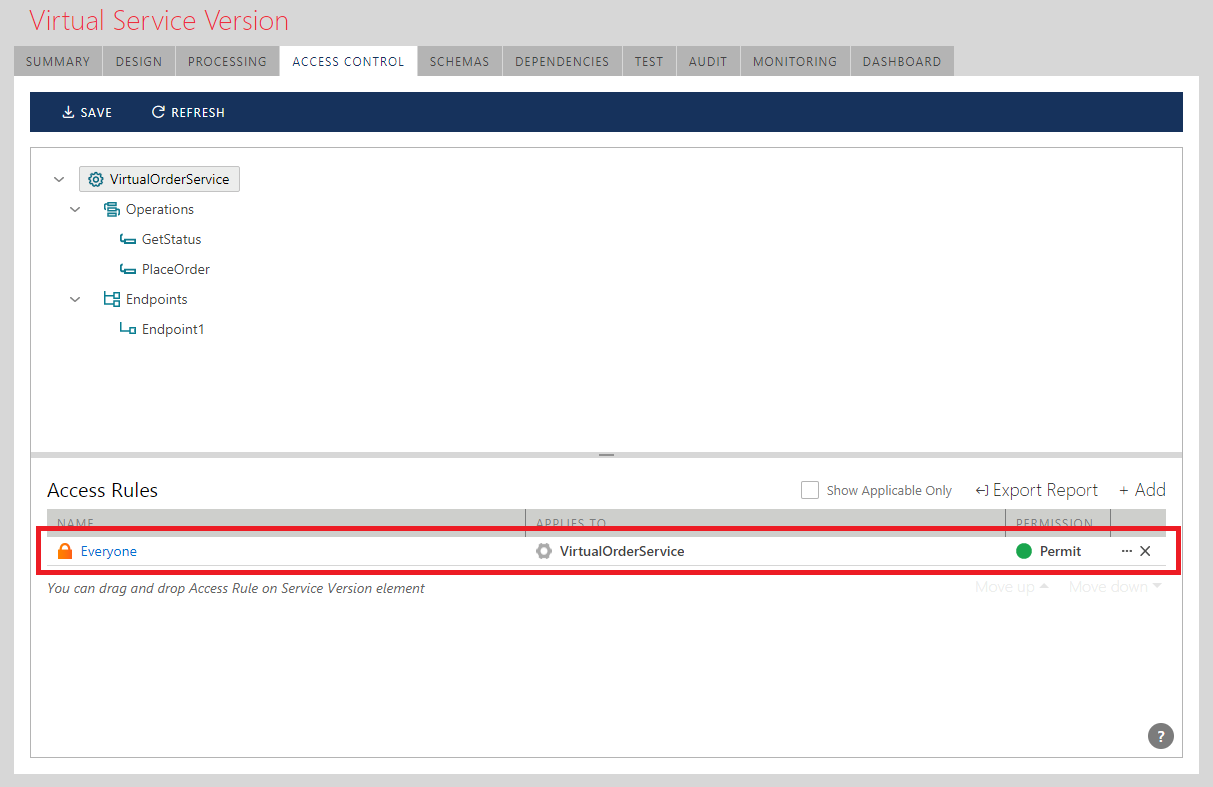
Click SAVE toolbar button.
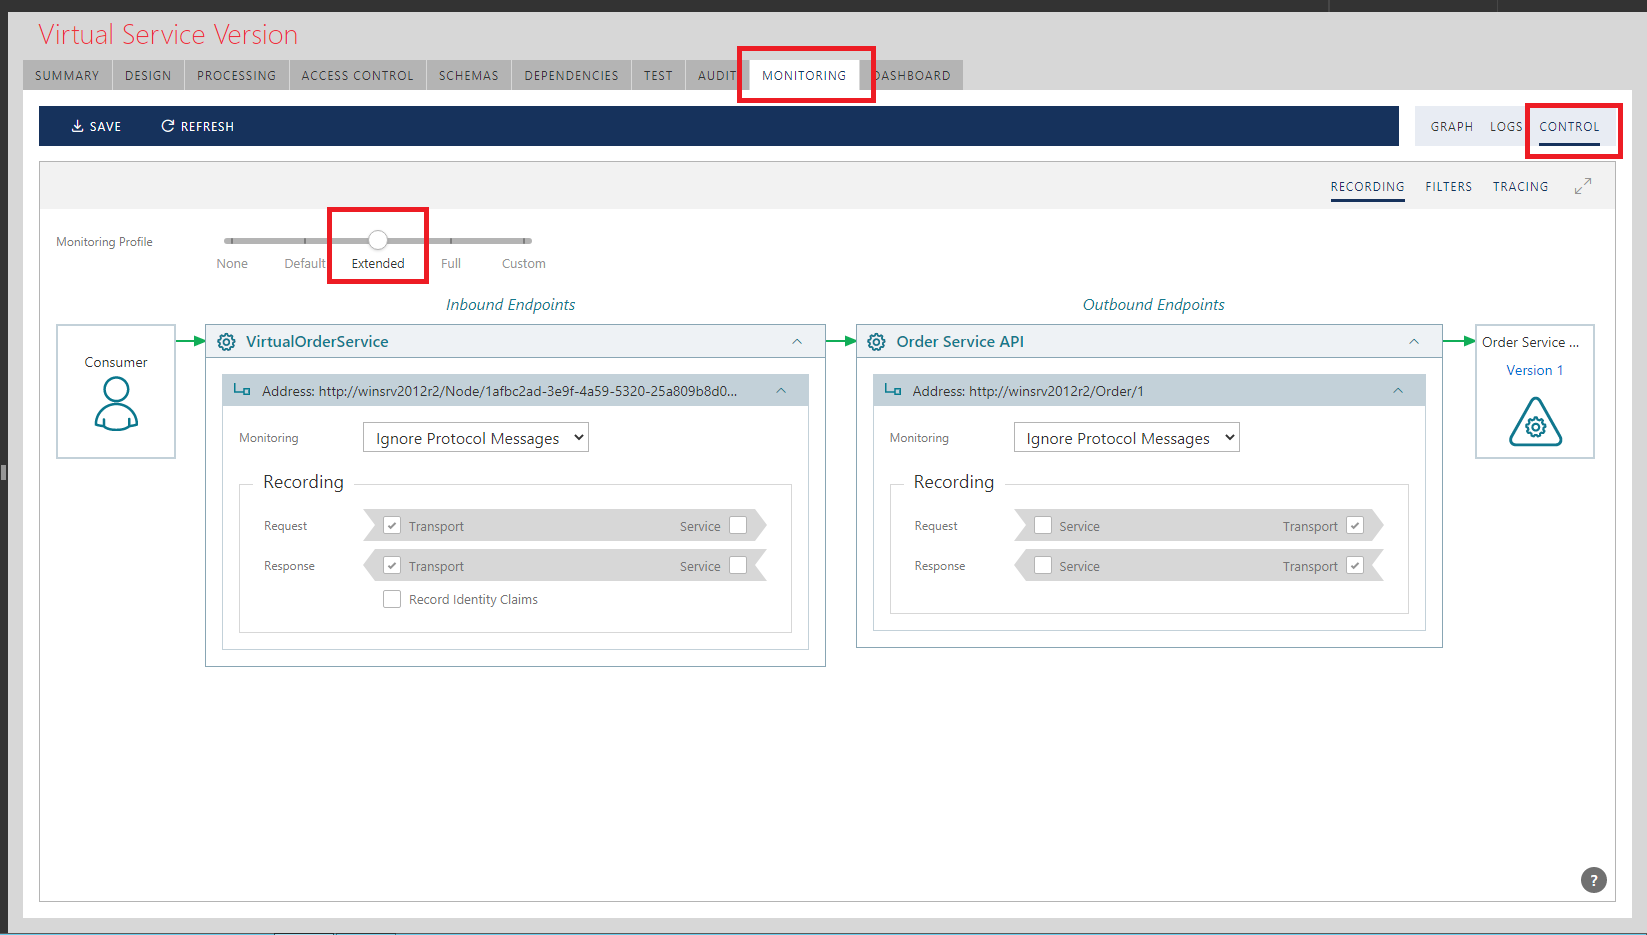
Now select MONITORING tab and its CONTROL subtab. Move Monitoring Profile slide bar from Default to Extended position. Click SAVE toolbar button. This setting allows Sentinet to record requests’ and responses’ complete payloads in all inbound and outbound endpoints (Default Monitoring Profile captures only basic information. See User Guide, Monitoring and Recording Control chapter for more details).
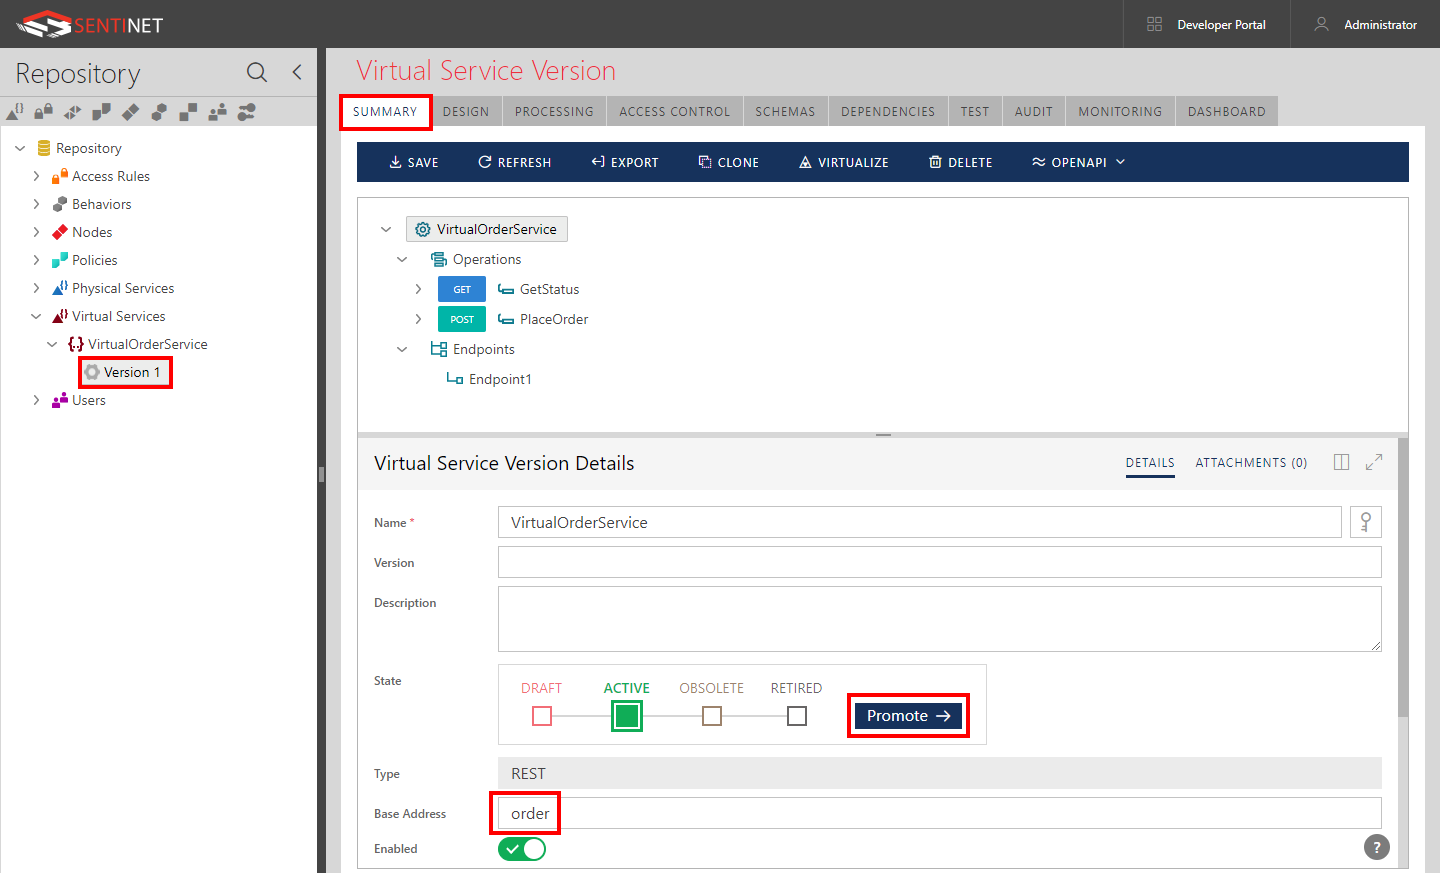
Navigate to VirtualOrderService SUMMARY tab, change Base Address GUID value to something more readable, for example order. This will change default address generated with unique GUID to a more friendly address, such as http://winsrv2012r2/Node/order.svc.
Promote virtual service to the Active state by clicking Promote button.
Click SAVE toolbar button.
At this point, we have registered physical service (backend API), designed virtual service and configured virtual service with endpoint, Access Control and non-default Monitoring Profile.