Sentinet Node
Installation
Launch Sentinet.msi installation package.
Read and Accept License Agreement by clicking I Accept.
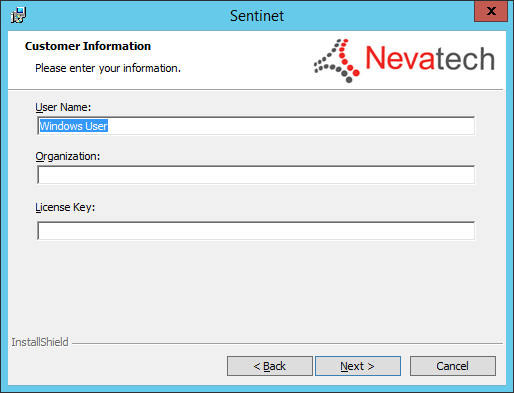
Enter User Name, Organization and a valid License Key provided by Nevatech.
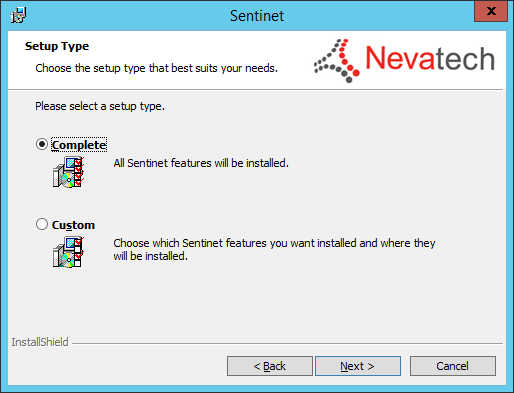
Select "Custom" to only install Sentinet Node. Select Complete for a full install.
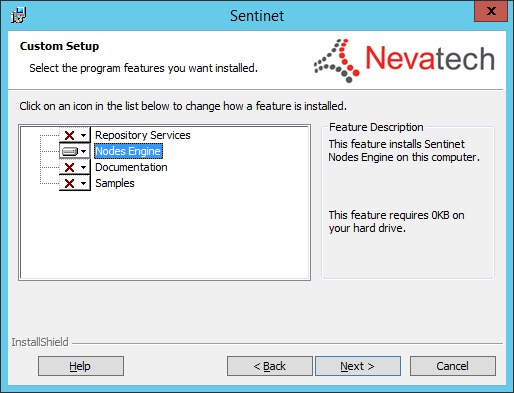
Select Nodes Engine feature if Custom setup type was selected above. Other features are optional.
Click Next to proceed with the installation. Wait for the Wizard to complete the install.
Configuration
Sentinet Node is a special .NET Application hosted on the IIS Server. It automatically starts when the IIS Service is started. When the Application Pool recycles, it automatically starts all Virtual Services hosted on the Node, and dynamically configures and opens Virtual Service endpoints. Sentinet Nodes are remotely controlled from the Sentinet Administrative Console, a browser-based User Interface application.
It is possible to create one or more independent Sentinet Nodes within a single IIS Server instance. Each instance is created and configured using the Sentinet Node Configuration Wizard.
The Configuration Wizard is a plug-in module in the Microsoft IIS Manager Administrative snap-in.
The process of creating and configuring Sentinet Node(s) consists of three steps:
Step 1. Register a new Sentinet Node in Sentinet Repository via Sentinet Administrative Console.
Step 2. Create and configure a new, empty IIS Web Application using the Microsoft IIS Manager administrative snap-in. As explained later in this chapter, a Sentinet Node will support all communication and security models based on the capabilities that are configured with the IIS Web Application.
Step 3. Use the Sentinet Node Configuration Wizard to create and configure a new (or update an existing) Sentinet Node instance associated with the Node registered in the Sentinet Repository.
Step 1. Register a new Sentinet Node in the Sentinet Repository
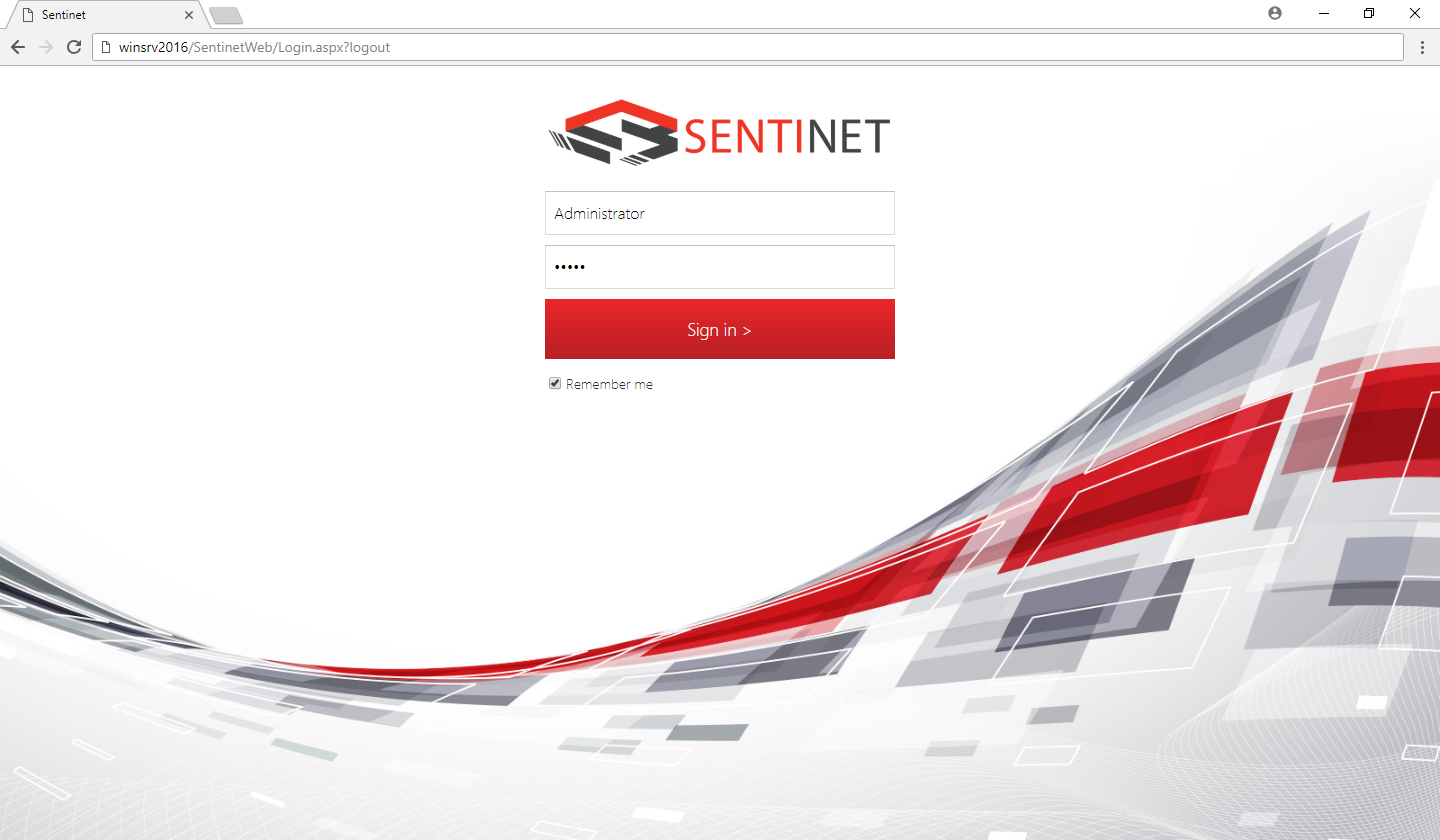
Run a web browser and navigate to the Repository Web Application address. The standard address is https://[host]/Sentinet where [host] is the internet or the machine address on which the Sentinet Repository Web Application is installed.
Login into the Sentinet Administrative Console with a Sentinet user account that has write permissions (such as the root administrative account created during Repository Web Application configuration process described above).
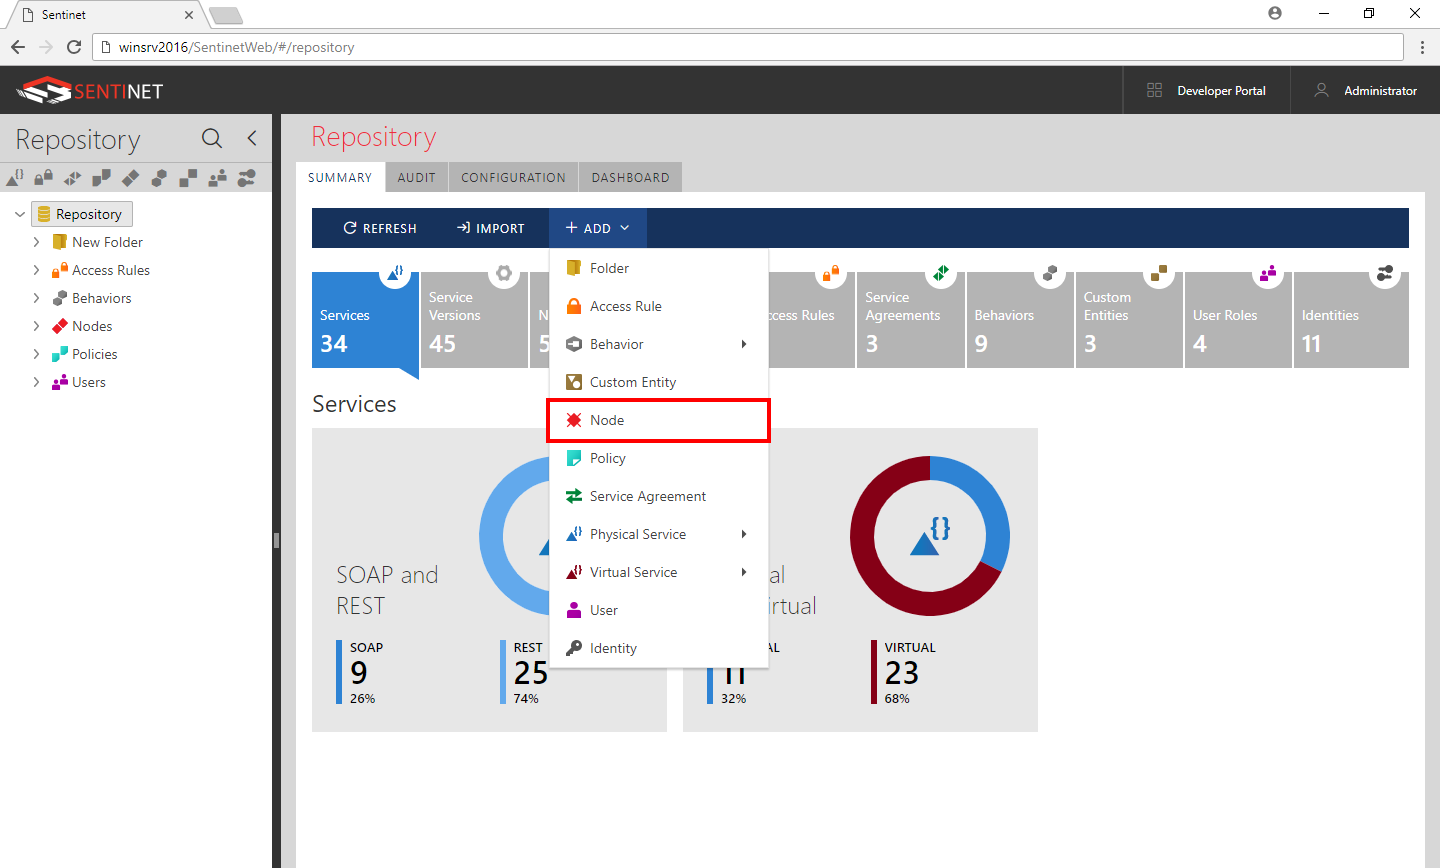
To create a Sentinet Node instance, select a Folder (in the Repository hierarchical tree structure) where you wish to register the Sentinet Node.
Right-click the folder tree item and select Add -> Node in the menu option. Alternatively, click the +Add button in the main toolbar and select the Node option.
In non-production environments, change the Node Heartbeat Interval to 10 seconds (by default the Heartbeat is set to recommended 120 seconds for production environments).
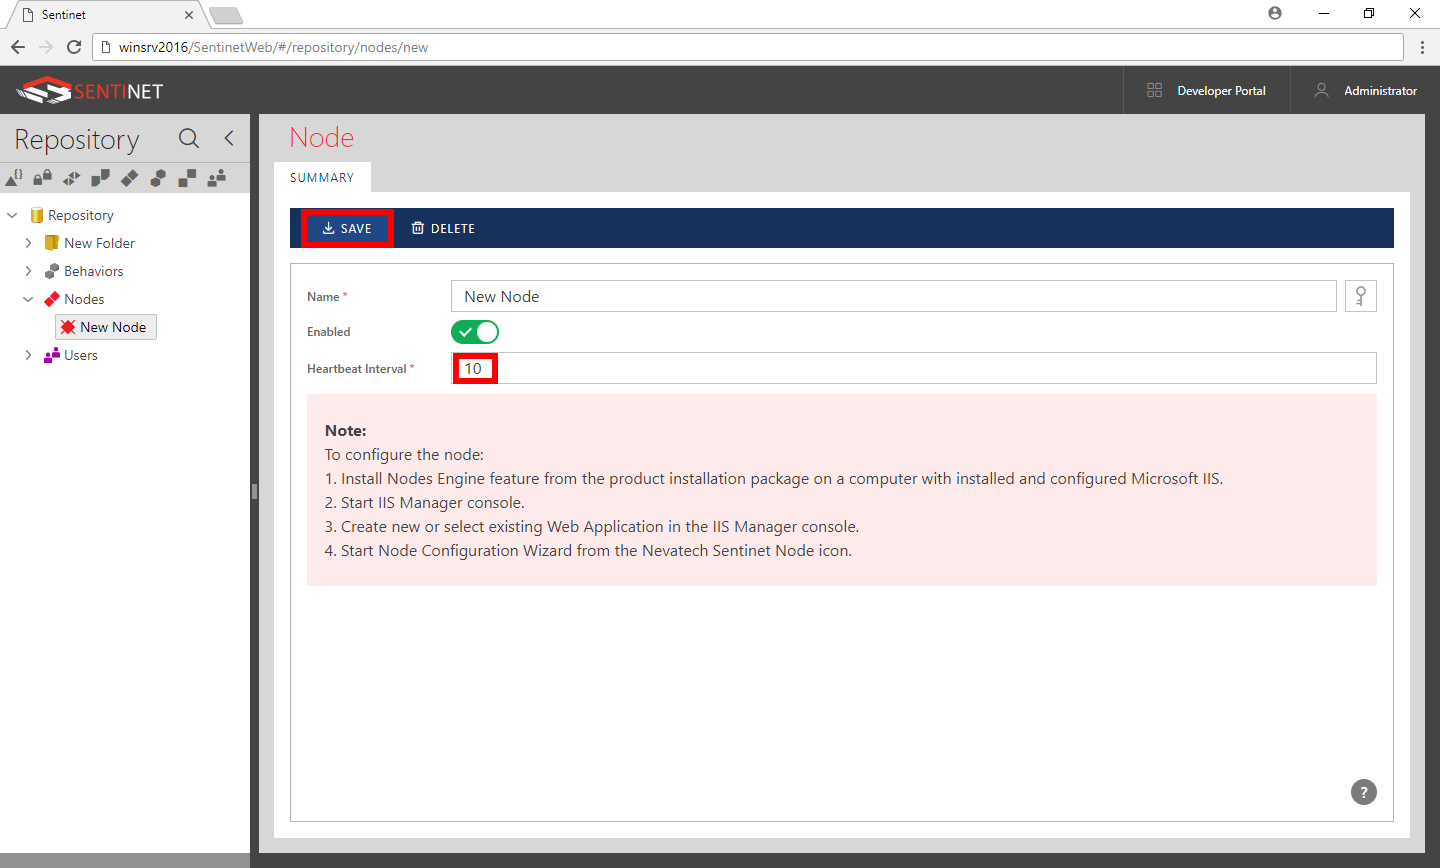
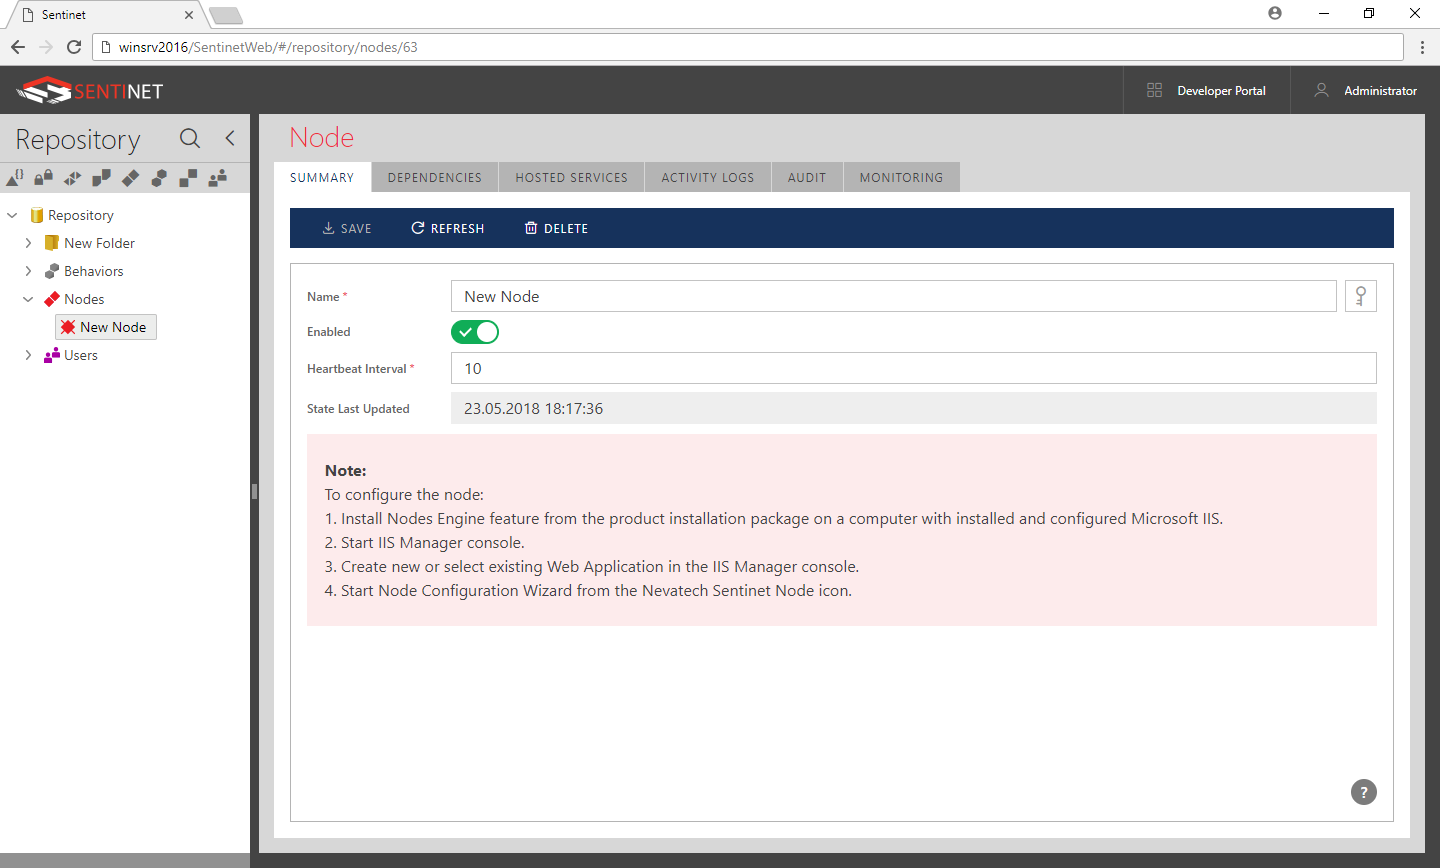
Click Save on the main toolbar to save Node settings. At this point, the Sentinet Node instance is registered with the Sentinet Repository and is ready to be configured.
Step 2. Create and Configure IIS Web Application for Sentinet Node
Create a new IIS Web Application using the IIS Manager administrative snap-in by opening the node Configuration shortcut (Start->All Programs->Nevatech->Sentinet-> Node Configuration) or the Administrative Tools->IIS Manager shortcut.
It is recommended to pre-create an isolated Application Pool dedicated to a Sentinet Node before executing the next configuration steps. Use caution when selecting the Application Pool Identity. The Application Pool Identity will be the Windows identity of all Virtual Services hosted on the Node that require Windows identity security tokens in their security policies. The recommended Application Pool identity is the built-in machine pseudo-account, ApplicationPoolIdentity, which is configured with the typical and minimal system access privileges.
Select an IIS Server Web Site that will host the Sentinet Node (for example, Default Web Site). Right-click and select the Add Application menu option.
Note
Multiple Sentinet Nodes can be installed under the same Web Site, or within different IIS Web Sites.
A Sentinet Node can also be installed in the root of an IIS Web Site. In this case, Web Site must not contain any other IIS Applications or virtual folders in it and Web Site should be completely dedicated to a single Sentinet Node application. Installing the Sentinet Node in the root of a Web Site gives the additional advantage of full control over addresses of virtual services hosted in the Node.
Provide an Alias name for the Sentinet Node Application (for example, Node) and select an Application Pool. You must select an Application Pool configured with the .NET CLR Version 4.0 and Managed Pipeline in an integrated mode (for example .NET v4.5 Application Pool).
Note: If the selected Application Pool does not satisfy the configuration requirements, a warning will be displayed and the Sentinet Node will not be created.
Browse to a (or create a new) physical Folder that will be mapped to the IIS Application Virtual Directory. Click OK to create a new, empty IIS Application. A new IIS Application will be created and highlighted in the Web Site tree.
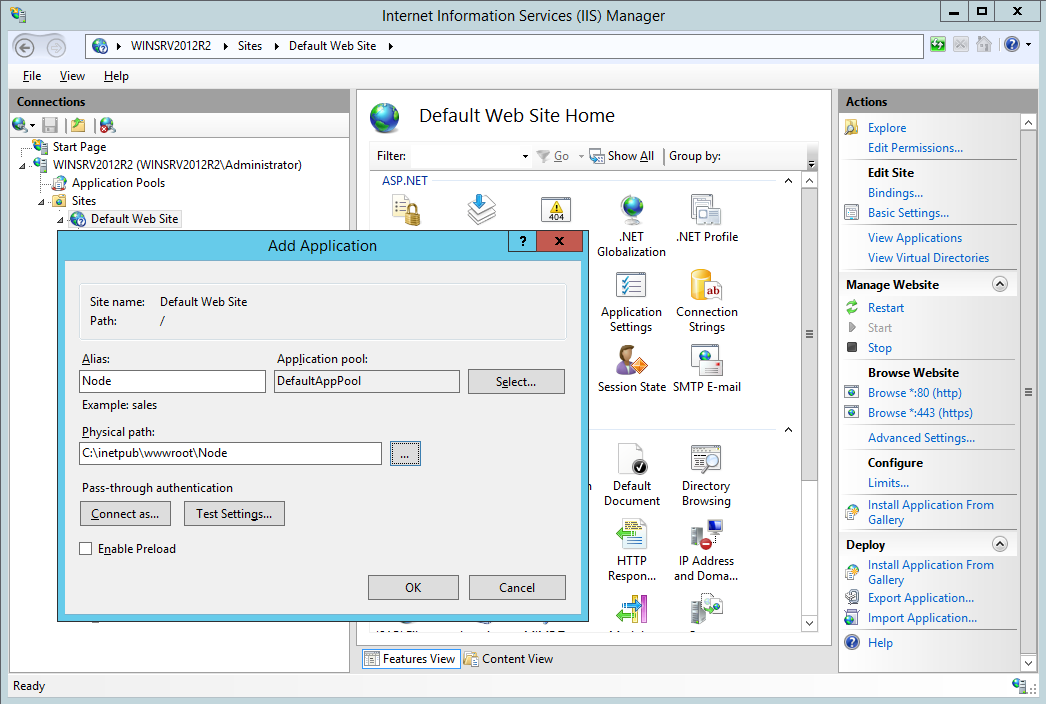
Step 3. Configure the Sentinet Node
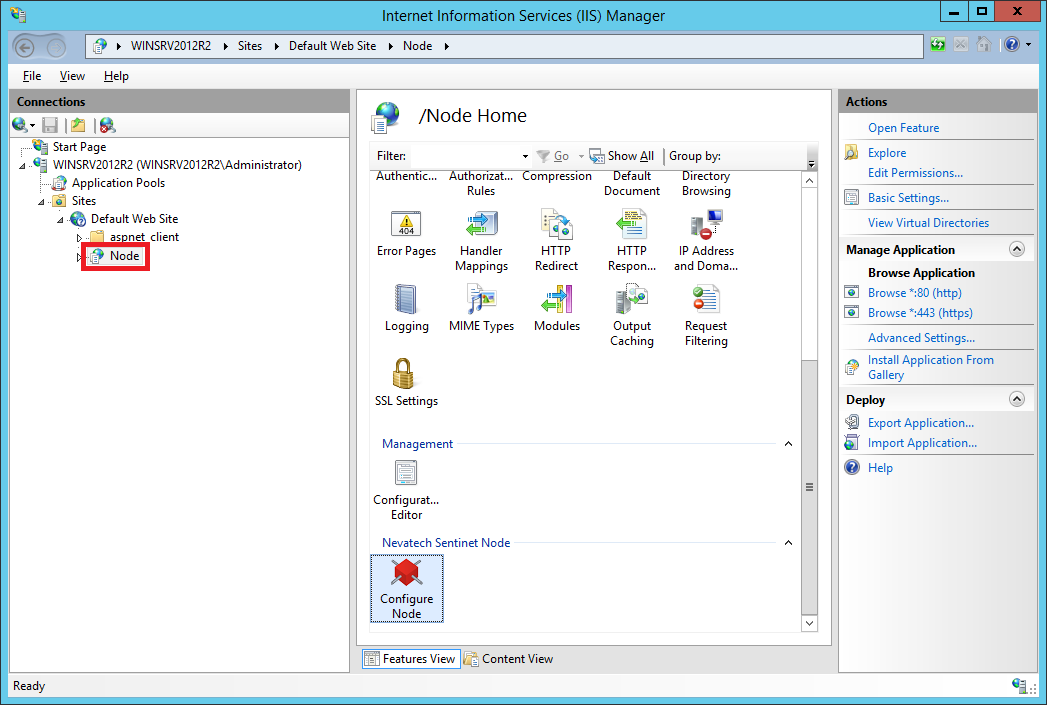
Select the IIS Web Application created in Step 2. In Application Features View find the Configure Node icon in the Nevatech Sentinet Node section.
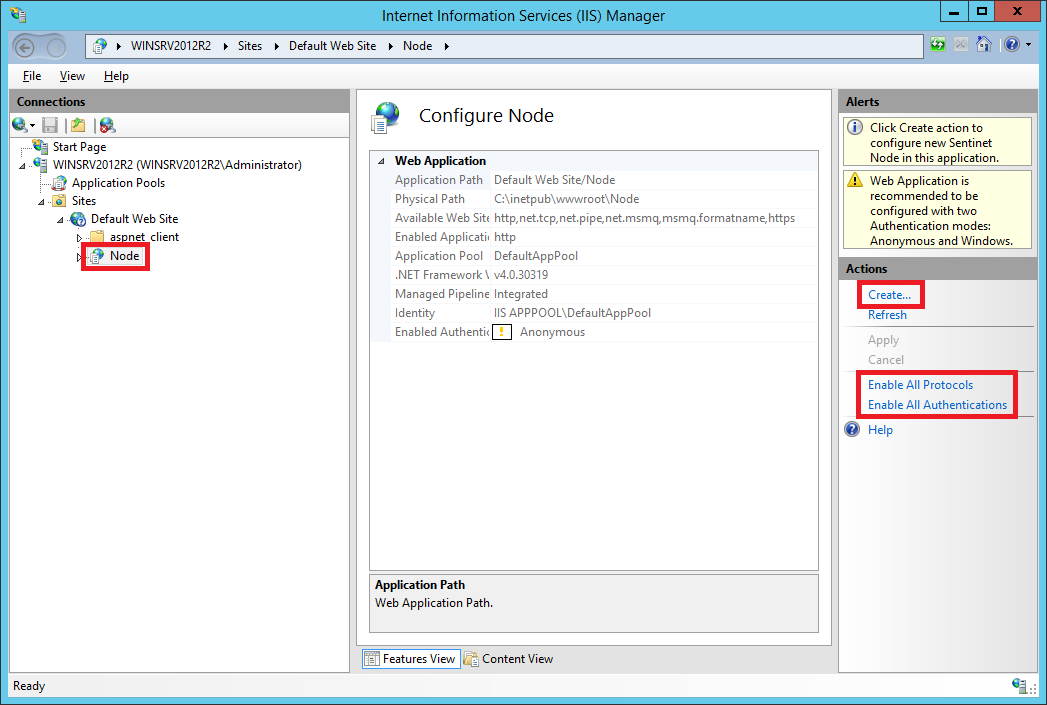
Double-click the Configure Node icon to open a Configure Node screen. The screen displays the Web Application properties section with the summary of IIS Application current settings relevant to the Sentinet Node configuration. If the Application Pool configured with this Web Application does not satisfy the requirements (described in step 2, section 4 above) a yellow warning sign will show up regarding the .NET Framework Version and/or Managed Pipeline Mode. In the case of a warning being displayed, change the Web Application pool (or the Application Pool configuration) and return to the screen.
Following Actions will be displayed in the right Actions panel if certain conditions apply:
Enable All Protocols action is displayed when the IIS Application is not configured with all of the transport bindings available at the hosted Web Site (optional Action).
Enable All Authentications action is displayed when the IIS Application is not configured with either Anonymous or Windows transport-level authentication methods (optional Action).
Enabling either or both options above is recommended to increase capabilities of the Sentinet Node.
Note
- Basic Authentication should not be enabled with IIS Application (strongly recommended to be disabled with the Sentinet Node IIS Application), because Sentinet provides its own, more capable implementation of Basic Authentication, that can be configured against any identity store.
- If MSMQ protocols are enabled with the Web Site, ensure MSMQ Windows Service is started.
Click on the Create action in the right panel to start the Node Configuration Wizard.
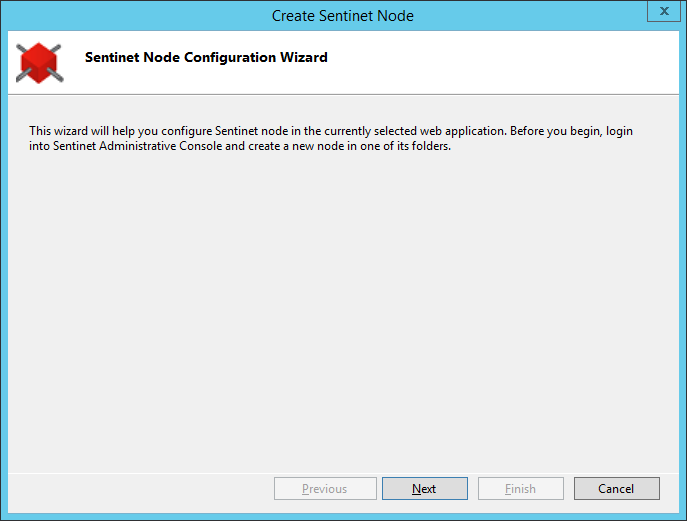
Click Next on the Welcome screen to continue configuration.
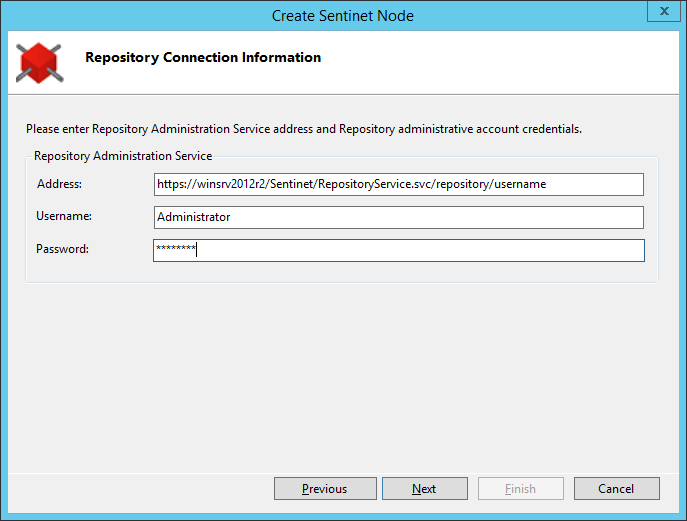
Provide a valid https address for the Sentinet Repository Web Service endpoint address.
This is the address of the machine where the Sentinet Repository Web Application is installed and configured. Usually you only must replace the machine name in the default address field: https://localhost/Sentinet/RepositoryService.svc/repository/username.
If the installed Sentinet components are on the same computer, the computer name must still match the common name of the X.509 SSL certificate assigned to Sentinet Repository Web Site (see Sentinet Repository Services Application configuration, step 3). Provide credentials of the user account with write permissions. Click Next to continue.
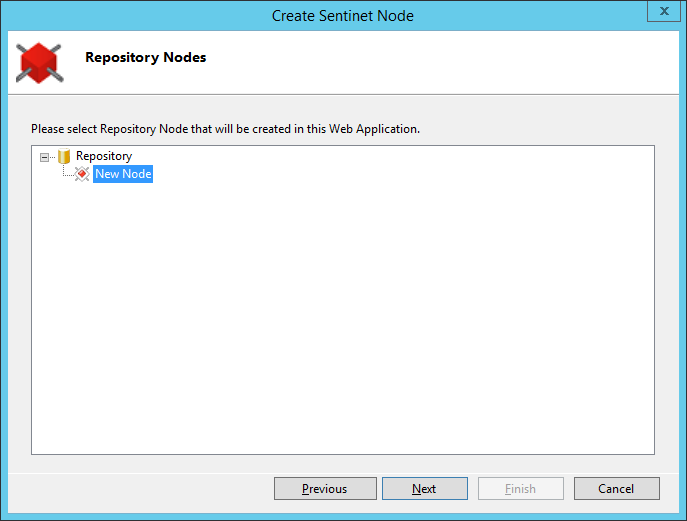
Repository Nodes screen displays the subset of the Repository tree with all Sentinet Nodes registered in the Repository database starting from the Repository folder that the user (identified by the Username field) has access to.
Select the Node from the Repository tree. Selected Repository Node will be associated with the physical instance the Configuration Wizard is currently creating. Click Next to continue.
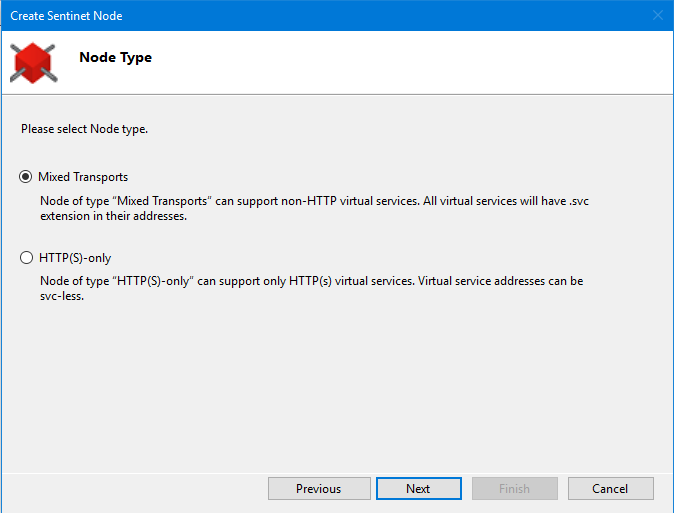
Select Node type from Node Type screen.
Mixed Transports -- Nodes of this type can host virtual services over any transport supported by IIS Server including non-HTTP transports. All virtual services hosted on this Node type will have .svc extension in their endpoints' addresses except Microsoft Azure Service Bus addresses which can be "svc-less" (see Sentinet User Guide, Integration with Microsoft Azure Service Bus chapter for more details). Mixed Transport is the recommended Node Type.
HTTP(S)-only - Nodes of this type only support HTTP and HTTPS services. Virtual services hosted on this Node type can be "svc-less". Nodes of this type are often used for hosting REST APIs that require arbitrary svc-less endpoint addresses (SOAP services hosted on this Node type can also have svc-less endpoint addresses. Microsoft Azure Service Bus non-HTTP endpoints can also be hosted with this type of Node).
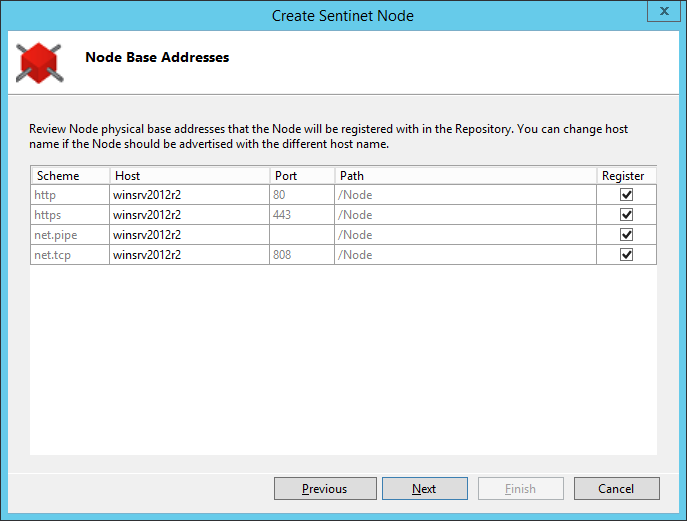
Node Base Addresses screen displays all base addresses and transport protocols the Node can be configured with. Select at least one base address (or multiple, or all addresses). Click Next to continue.
Note
Path and Port of the Sentinet Node base address cannot be changed on this configuration screen, because they are assigned to a Web Site and its virtual directory at the time the virtual directory is created in IIS Manager. Administrators can only change the Host Name. This change is typically done, when virtual services hosted on the Sentinet Node are accessed by an external address different from the local machine name (for example, www.contoso.com). The Sentinet Node can also be deployed behind a network device (for example, a network load-balancer) that provides address translation (or routing). Consider an example of a Sentinet Node deployed on the myserver host machine in the IIS Server Web Site with port 80. Sentinet Node HTTP default base addresses will then be: http://myserver/VirtualDirectory. If the Sentinet Node is deployed behind a network load-balancer with its own external address www.contoso.com, then the Sentinet Node base address on the configuration screen can be changed to http://www.contoso.com/VirtualDirectory With this change, the Sentinet Repository will emit virtual services' metadata with HTTP addresses that start with http://www.contoso.com/VirtualDirectory, which is exactly how the consumer applications will have to know them. Internal myserver host name becomes irrelevant to the Repository but may remain relevant to the load-balancer configuration. Sentinet Node base addresses are assigned through the Node Configuration Wizard from the machine on which the Sentinet Node is deployed. These base addresses are then reported to the Sentinet Repository. Sentinet Administrators can later update them by running Node Configuration Wizard embedded into IIS Manager Console. The Node Host name can also be changed at any time from the Sentinet Administrative Console, because it affects only how a services' metadata is emitted and not the actual runtime execution.
Note
The one exception to this rule is when the Sentinet Node base address is assigned a Microsoft Azure Service Bus address. In this case, the Sentinet Node base address is an external Microsoft Azure Service Bus address which is irrelevant to the IIS Server address on which the Sentinet Node is deployed. For that kind of deployment, the IIS Server is just a hosting environment for the Sentinet Node application that does not really use any IIS Server listening capabilities. Microsoft Azure Service Bus virtual services hosted in the Sentinet Node create outbound connections to the Azure Service Bus. Their base addresses are created from the Sentinet Administrative Console by assigning Service Bus namespace, Issuer Name and Issuer Key that correspond to Microsoft Azure Service Bus account.
See Sentinet User Guide for more details on how to configure Sentinet Node with the Microsoft Azure Service Bus.
On the Node Identities screen provide:
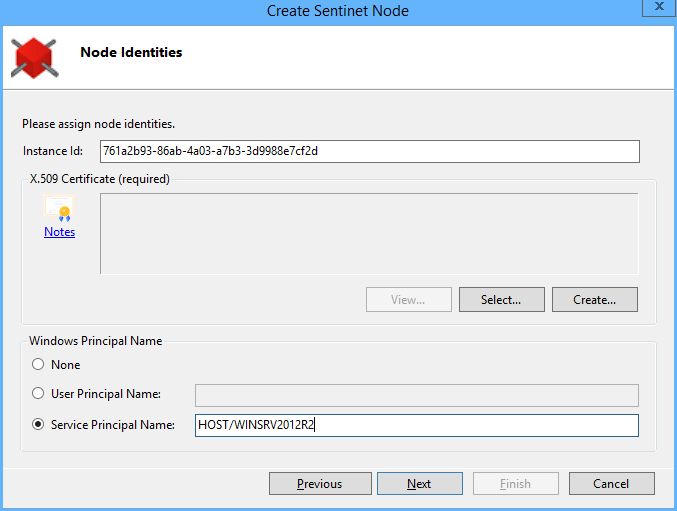
- Node Instance Id. Node Instance Id is auto-generated, but it can be changed to any user-friendly name. Instance Id is meant to provide the distinction between physical (typically clustered) instances of the same logical Repository Node. Load-balanced Node instances deployed in an on-premises environment will be monitored individually, just as transactions sent through a Node cluster can be monitored and filtered by each member of a cluster. Sentinet Node elastic cloud instances typically use the auto-generated Node Instance Id, because cloud environments typically have the capability to create and destroy virtual machines through automated processes and simple commands. Default Node instance Id is unique for a given instance of an Operating System, which means that different Nodes running on the same machine may have the same Instance Id, but combination of Node Id and Node Instance Id will always be unique.
-
Node X.509 Certificate identity. This is the identity the
Node will use to securely communicate with the Repository
Services. Select a certificate from the list of currently
installed valid certificates (Select), or request
Repository Web Application to generate a new X.509
certificate that will be signed by the Repository Signing
Certificate (Create). You can click View to review
details of the selected certificate.
Load-balanced Node instances must be configured with the exact same X.509 certificate (read Notes behind the link located below the certificate icon). When moving a Node certificate from one machine to another, make sure that the certificate is trusted on the machine(s) on which it is copied to.
- Optional Windows Principal Name that will be used for the virtual services hosted on the Node. The setting affects only metadata publication of the virtual services that require their own Windows Identity.
Click Next after the Node certificate is selected or created.
On the Node Configuration Summary screen click Finish to run the configuration process.
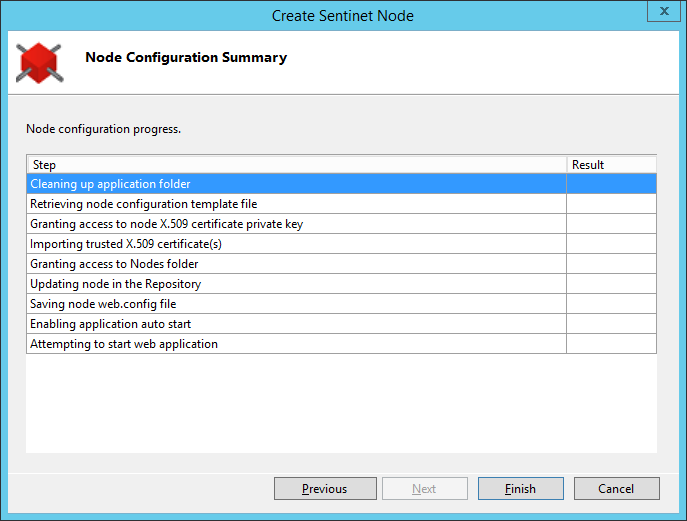
Configuration Summary screen will display the progress of the configuration process.
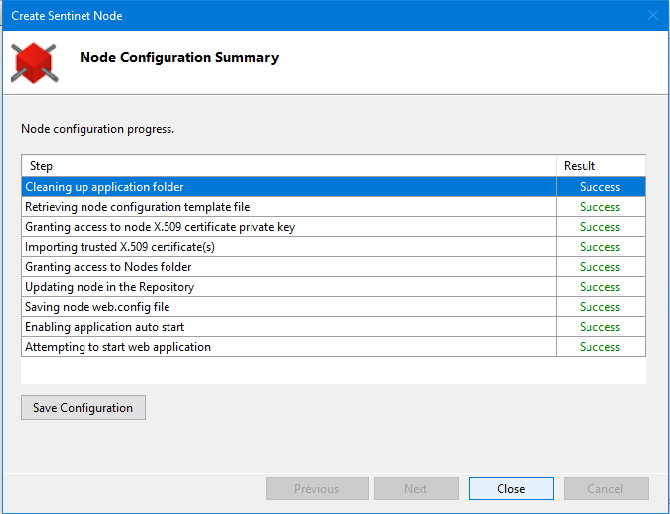
Once the Node configuration process is completed click Close button.
Note
Before closing Node Configuration Wizard, you can click Save Configuration button (see screenshot above) to save input data collected by this Wizard in configuration file. This configuration file can later be used for automated deployments, installations and product upgrades (see Appendix A in this document for more details).
After closing the Configuration Wizard, a Web Application Features View will display the Sentinet Node properties section. Verify that the Status property shows Normal (green) status. Now the Node is fully configured and it heartbeats to the Repository Web Application.
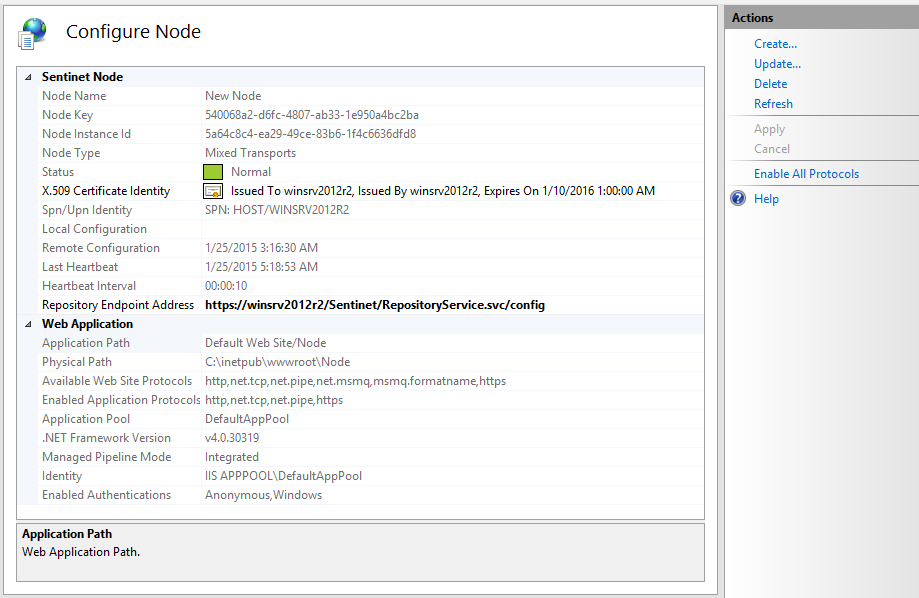
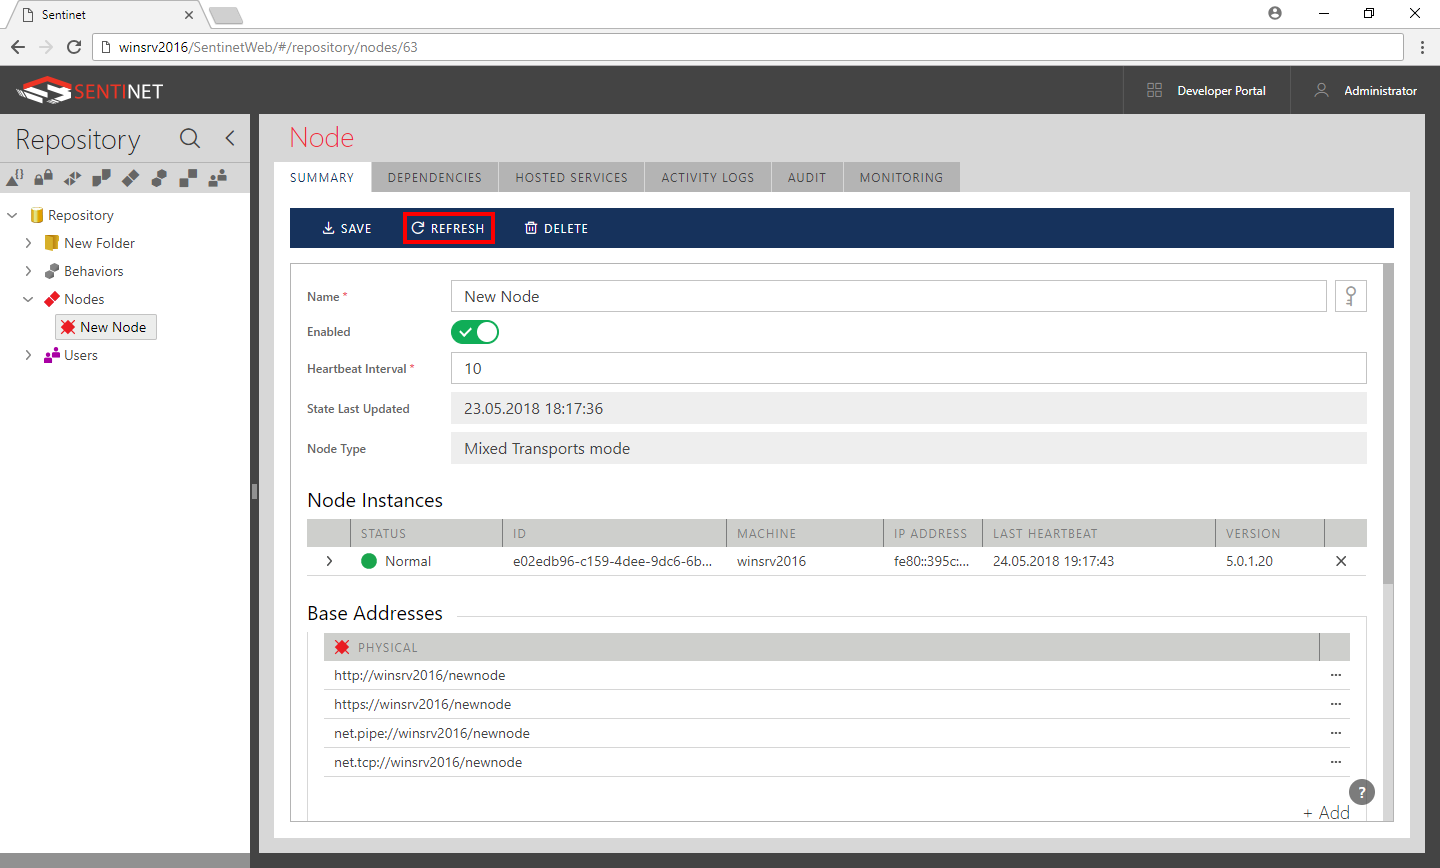
Go back to the Sentinet Administrative Console screen, click Refresh toolbar button of the Nodes SUMMARY screen and observe Node reported as fully registered in the Repository.
