Appendix B. Administrative Console Configuration with Windows Integrated Security
As described in the Security Deployment Scenarios chapter, the Sentinet Administrative Console can be configured with Windows Integrated security.
This process requires installation and configuration of a new, dedicated deployment of the Repository Web IIS Application. The existing deployment will keep serving communication channels 2 and 3, that are not compatible with Windows Integrated required security.
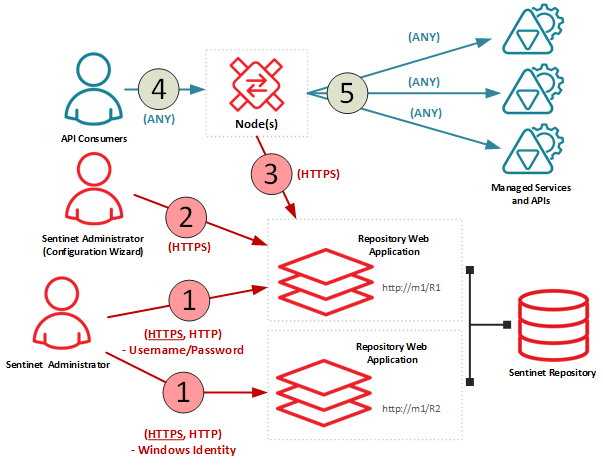
The second deployment is configured only with communication channel 1 and requires Windows Integrated Security. The dual-deployment configuration allows users to login to Sentinet Administrative Console using either a Username/Password or the Windows Integrated Identity.
Note
It is possible to configure the Sentinet Repository application with other available security models (see Appendix B on how to configure client X.509 certificate security deployment scenario).
By removing channel 1 from the default deployment configuration, Windows Integrated Security becomes the only option available for Sentinet Administrators.
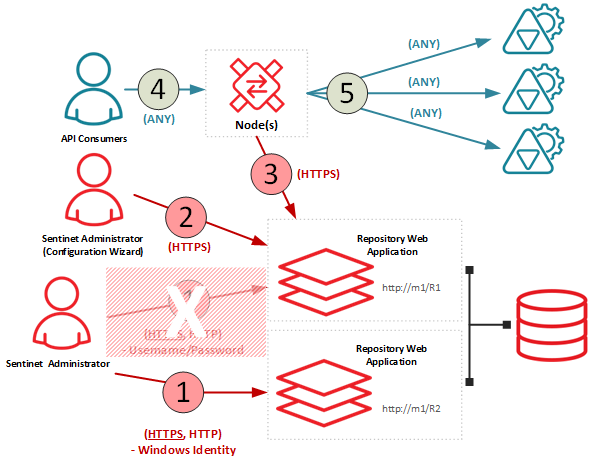
All deployments can be installed and configured on either a single machine or separate machines. To create deployment with Windows Integrated Security:
Add Windows Identities to the existing Sentinet Console user account or create new user accounts set with Windows Identity type credentials. To add Windows Identity to existing user account:
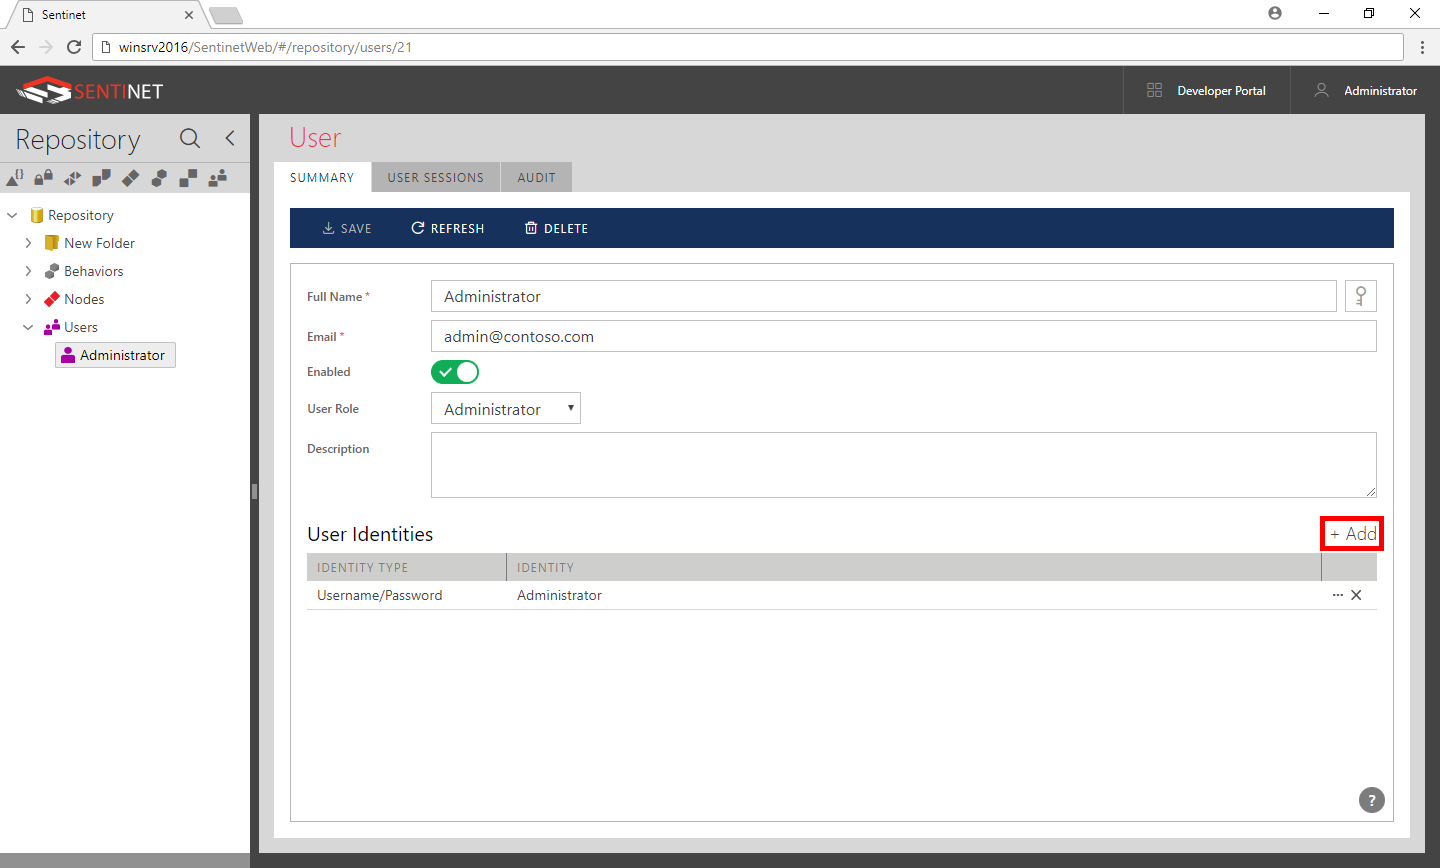
Login into the Sentinet Administrative Console. Select the Users tab located on the left navigation panel. Select a user account in the Repository tree hierarchy and click +Add to add new identity to selected User account.
To add an identity, click the +Add button.
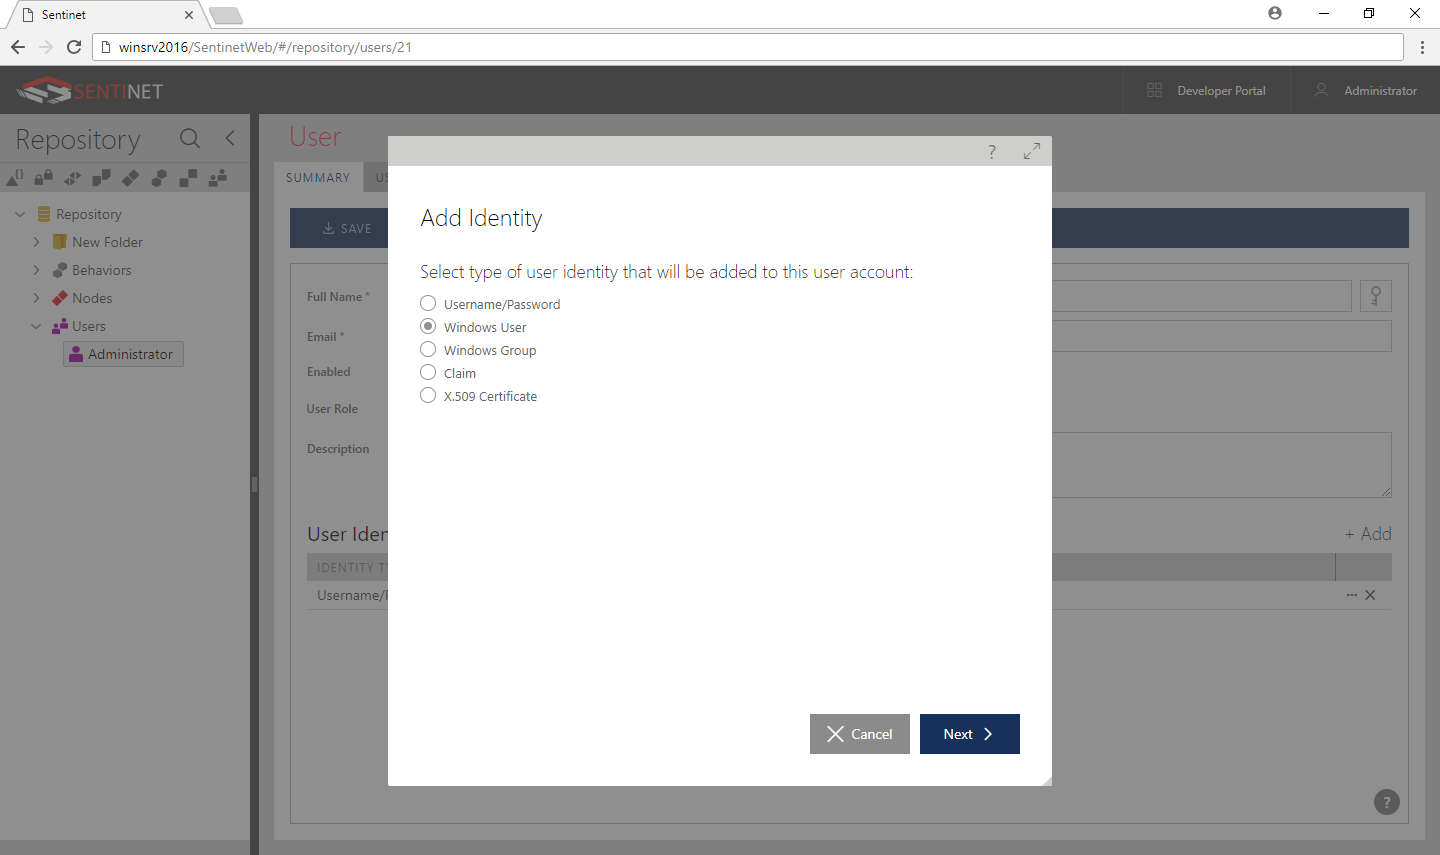
Select the Windows User or Windows Group option and click Next.
Enter a Windows domain name (for domain accounts) or the machine name (for local accounts), and Windows user name (for Windows User option).
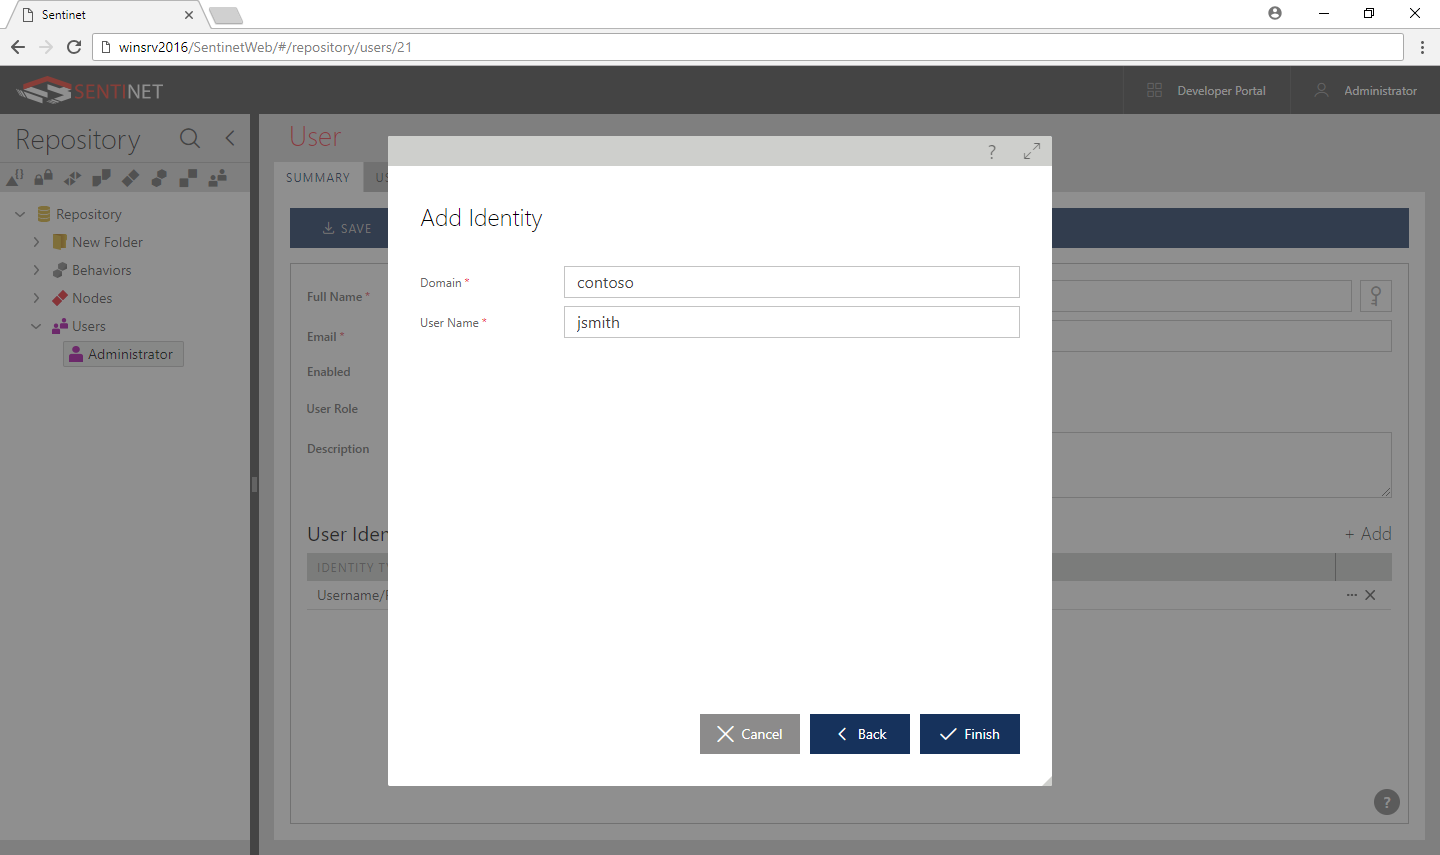
Click Finish in the Add Identity Wizard.
Click Save on the main toolbar.
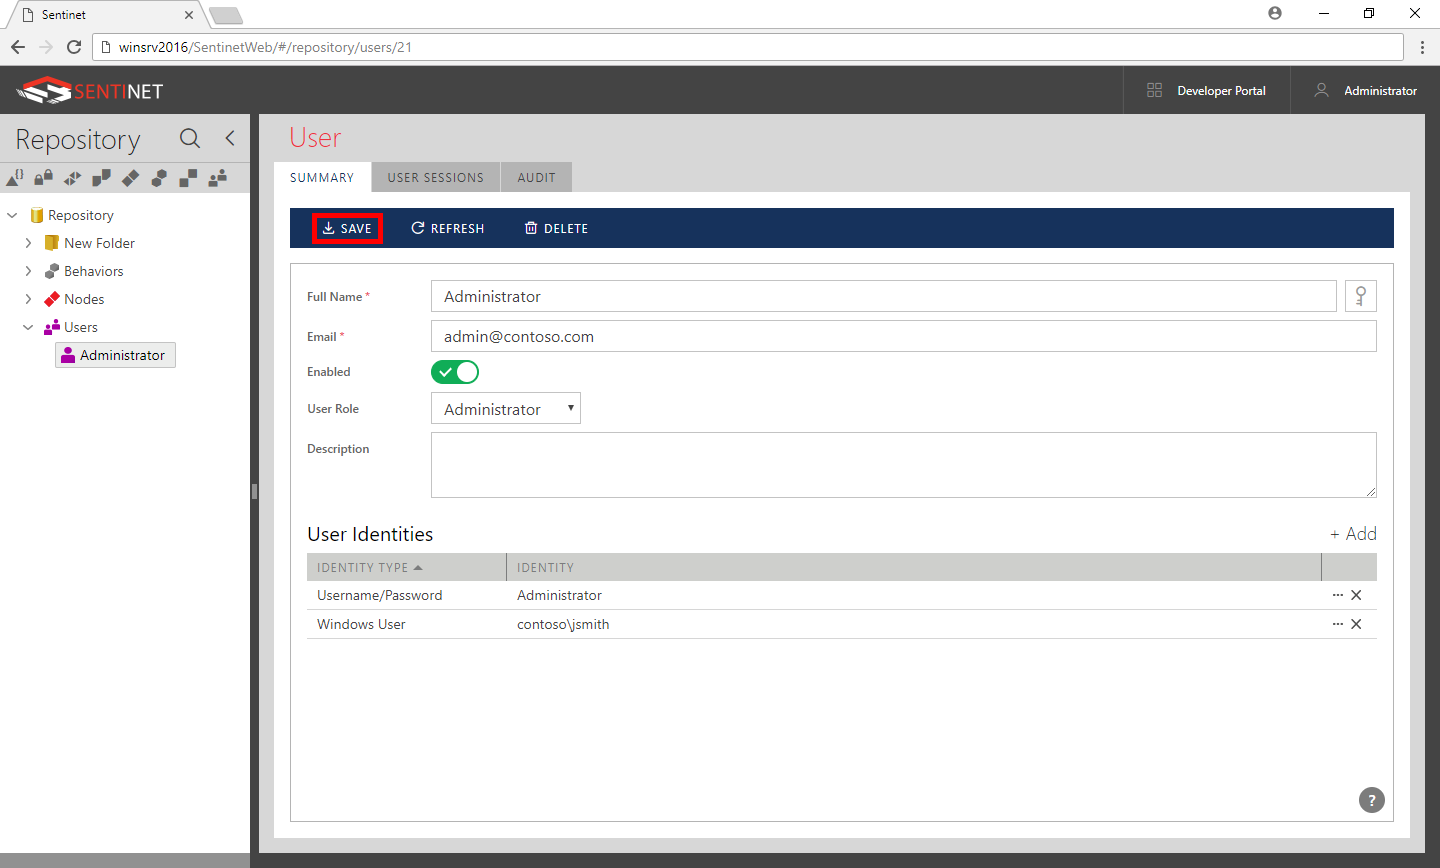
The Sentinet user account is now configured to use any of two types of identities: Username/Password or Windows Identity. Now you have to create a new instance or modify existing configuration of the Repository Web IIS Application to use Windows Integrated Security.
If Windows Integrated deployment must be installed on a new machine that should not have Repository Web Application deployed with the default configuration
Configure a new Repository Web Application deployment by running the Repository Configuration Application from the Repository Configuration Windows shortcut or by launching RepositoryConfiguration.exe located in the root of the installation directory.
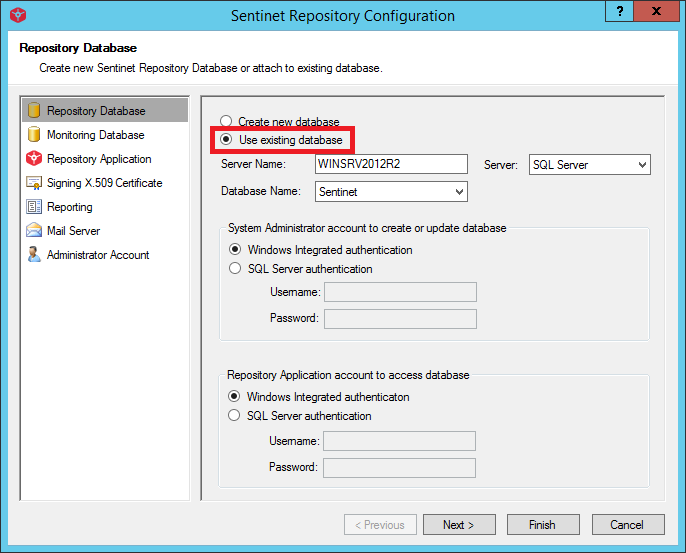
Attach configuration to an existing Repository database.
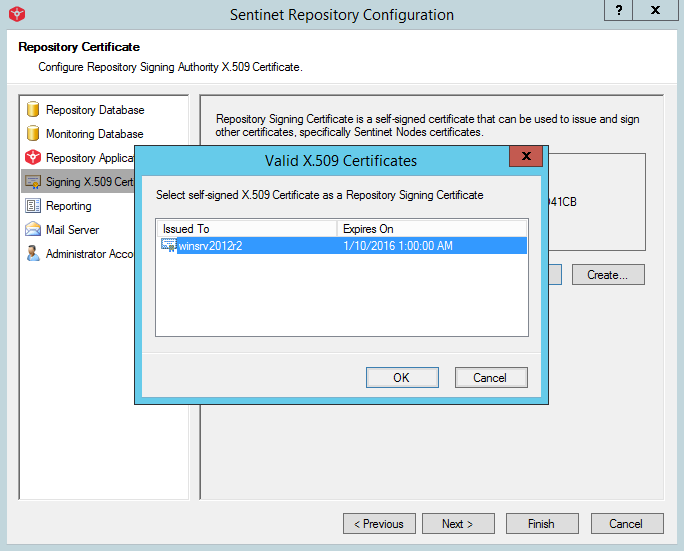
Select the certificate used in the initial deployment for the Signing Authority X.509 (it may be required to export this certificate with its private key and import it to the new server).
- Modify Sentinet IIS Application settings and its web.config file following steps 2 and 3 below from the Manual Deployment section.
If Windows Integrated deployment must be installed on the same machine which already has Repository Web Application deployed with the default configuration
You will have to create a new Sentinet IIS Application to host Sentinet Repository Web Application with Windows Integrated Security. Creating this copy can be done in two ways:
Using automated scripts provided in the C:\Program Files\Nevatech\Sentinet\Samples\Installation folder.
Using manual deployment.
Important
Automated and manual deployment scenarios below assume that the new Sentinet IIS Application will be configured in the same IIS Application Pool as the original, default Sentinet IIS Application. If you need to use different IIS Application Pool, you will have to modify the script or to use Manual Deployment scenario that runs RepositoryConfiguration wizard using new Application Pool.
Automated scripts for deploying Sentinet Repository Web Application with Windows Integrated security.
Run Config-Repository-WIS.cmd command that starts Config-Repository-WIS.ps1 PowerShell script. The script creates a copy of Sentinet Repository Web Application from existing (default) Web Application and configures this copy with Windows Integrated Security. Before you run Config-Repository-WIS.ps1 script, review and modify its variables listed at the top of the script.
Manual Deployment
» Copy the content of the default deployment folder (default location: C:\Program Files\Nevatech\Sentinet\Repository) to a new physical location, such as C:\Program Files\Nevatech\Sentinet\RepositoryWis, for which a new folder has to be created before the content is copied.
» Create new IIS Application (for example SentinetWis) in the IIS Manager and map it to a new physical location created above such as, C:\Program Files\Nevatech\Sentinet\RepositoryWis.
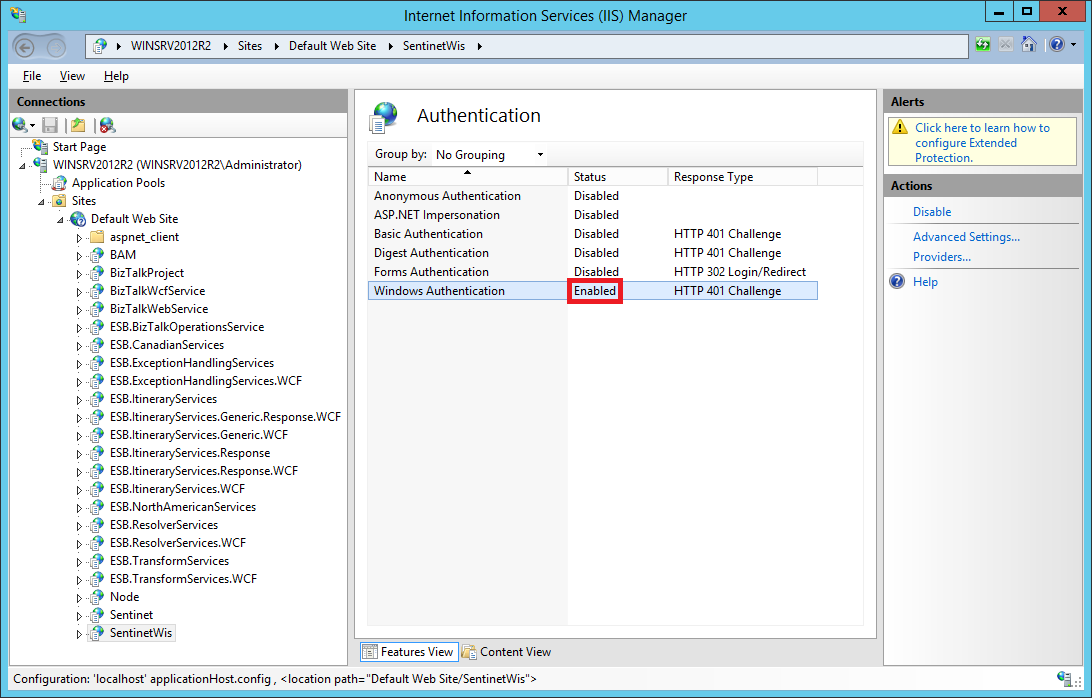
Modify new IIS Application's security settings using the Microsoft IIS Manager administrative snap-in.
» Open the IIS Manager from Windows Administrative Tools shortcut.
» Double-click the Authentication icon under the IIS group area.
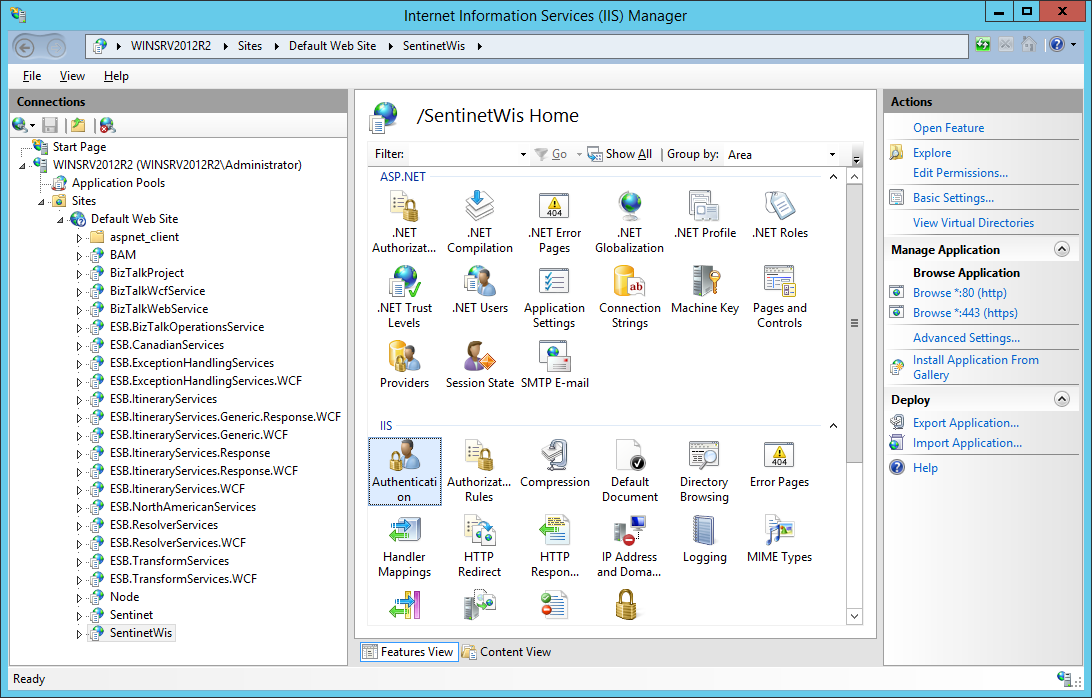
» Enable the Windows Authentication entry and disable every other entry.
Modify the application web.config configuration file of this new IIS Application.
» Select and right click on Web Application in the left panel. Select the "Explore" menu option.
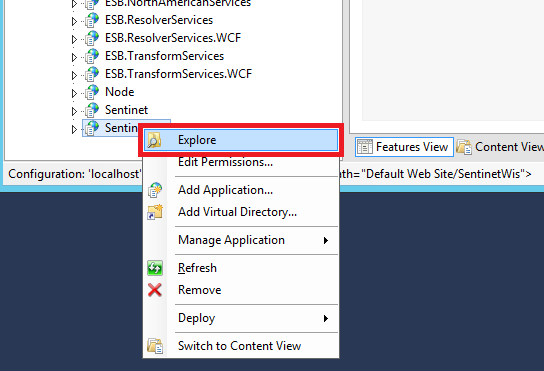
» In the Windows File Explorer locate and modify the web.config file:
i. Locate <services>...</services> section in the web.config file that defines
Repository WCF service endpoints. Remove (or comment out) endpoints with the name attributes:
name="RepositoryUserNameHttpsEndpoint"
name="ConfigurationCertificateHttpsEndpoint"
This modification will remove communication channels 2 and 3 (figure 6) from the Repository Web Application configured with Windows Integrated Security.
ii. Locate <customBinding>...</customBinding> section in the web.config file that defines Repository WCF endpoint bindings. Modify bindings with the following name attributes:
name="webHttpBinding"
name="webHttpsBinding"
Specifically, <httpTransport …> and <httpsTransport …> elements of the respective bindings have to be configured with authenticationScheme attribute:
<httpTransport authenticationScheme="Negotiate" ...>
<httpsTransport authenticationScheme="Negotiate" ...>
iii. Save the web.config file.
Open a browser and navigate to the new Sentinet Console Url (for example https://[machine]/SentinetWis) while logged into the workstation as domain (or local machine) account user (such as: dev.company.com/jsmith).
Bypassing the Sentinet Console Login screen, you will be logged in the Sentinet Console with the current Windows identity.
Navigating to the original deployment Url (https://[machine]/Sentinet) will prompt a Login screen, where alternative Username/Password credentials can be used.