Appendix D. Using Microsoft Entra ID as an external identity provider for Sentinet Management Console authentication
Use Azure Portal to create an enterprise application (https://portal.azure.com)
Go to Microsoft Entra ID resource (navigate from the leftmost menu).
Go to Manage\Enterprise application pane.
Go to Manage\All applications pane.
Click + New application menu.
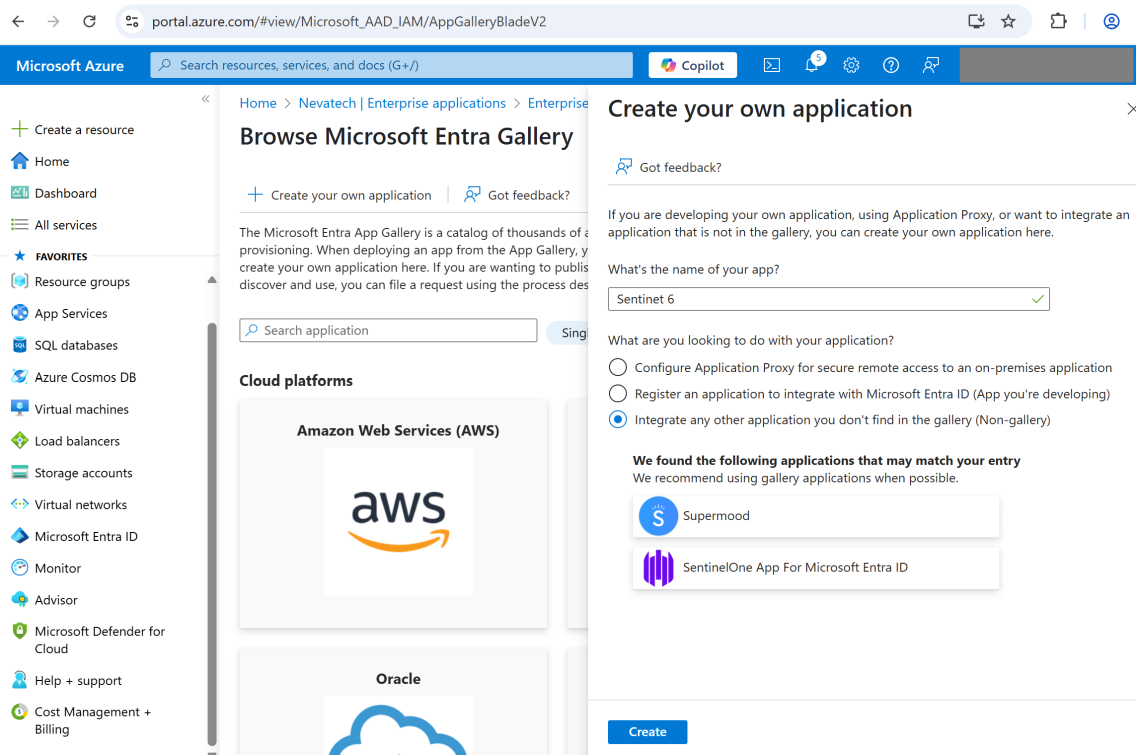
Click + Create your own application menu.
In the right pane, enter the application name and click Create button.
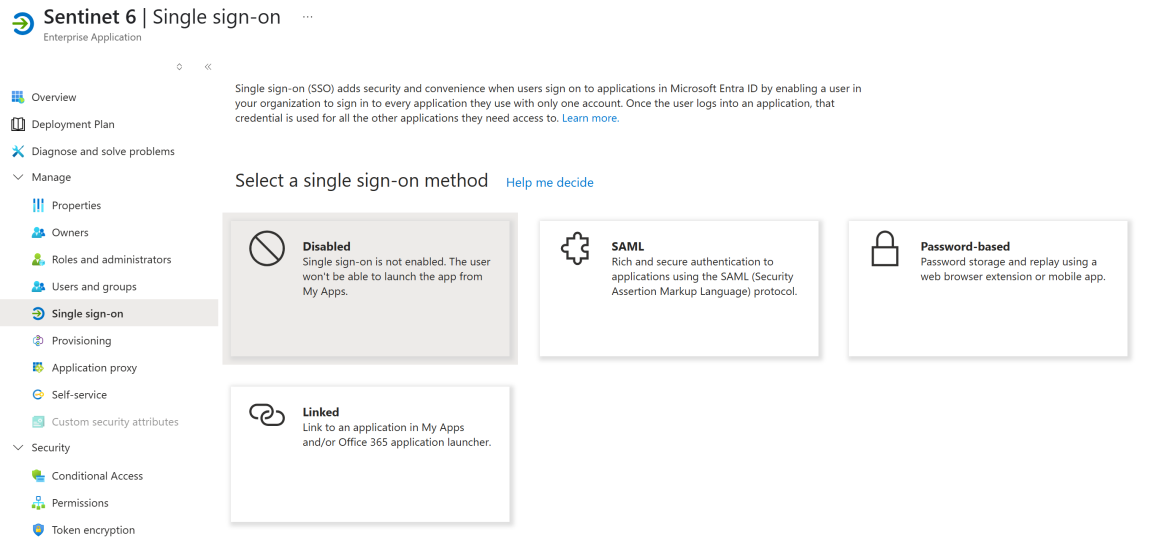
In the newly created enterprise application pane, go to Manage\Single sign-on pane.
Click on the SAML single sign-on method card.
Click the Edit button in the Basic SAML Configuration section.
In the right pane, add Identifier (Entity ID): click the Add identifier link and enter the value into a text box. For simplicity, we recommend using the Sentinet URL as an identifier.
Add Reply URL (Assertion Consumer Service URL): click the Add reply URL link and enter the value into a text box. The value must be the absolute URL to the Sentinet root folder.
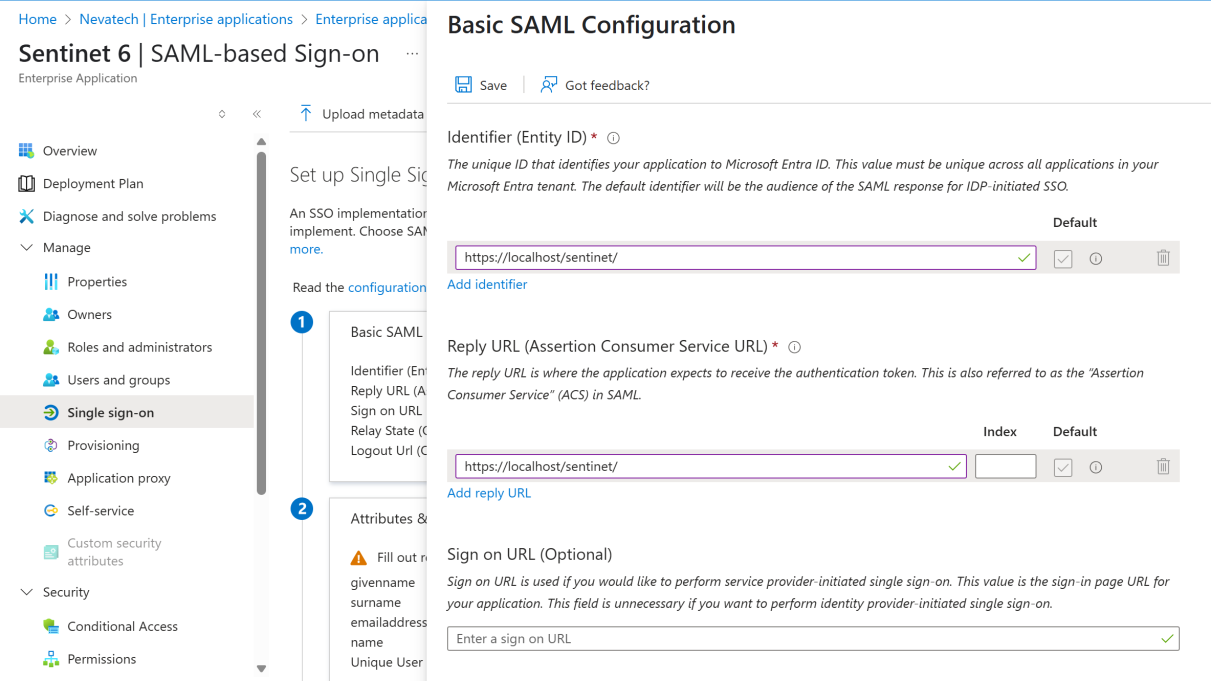
Click the Save button and close the right pane by clicking on X in the top-right corner.
Review the application settings.
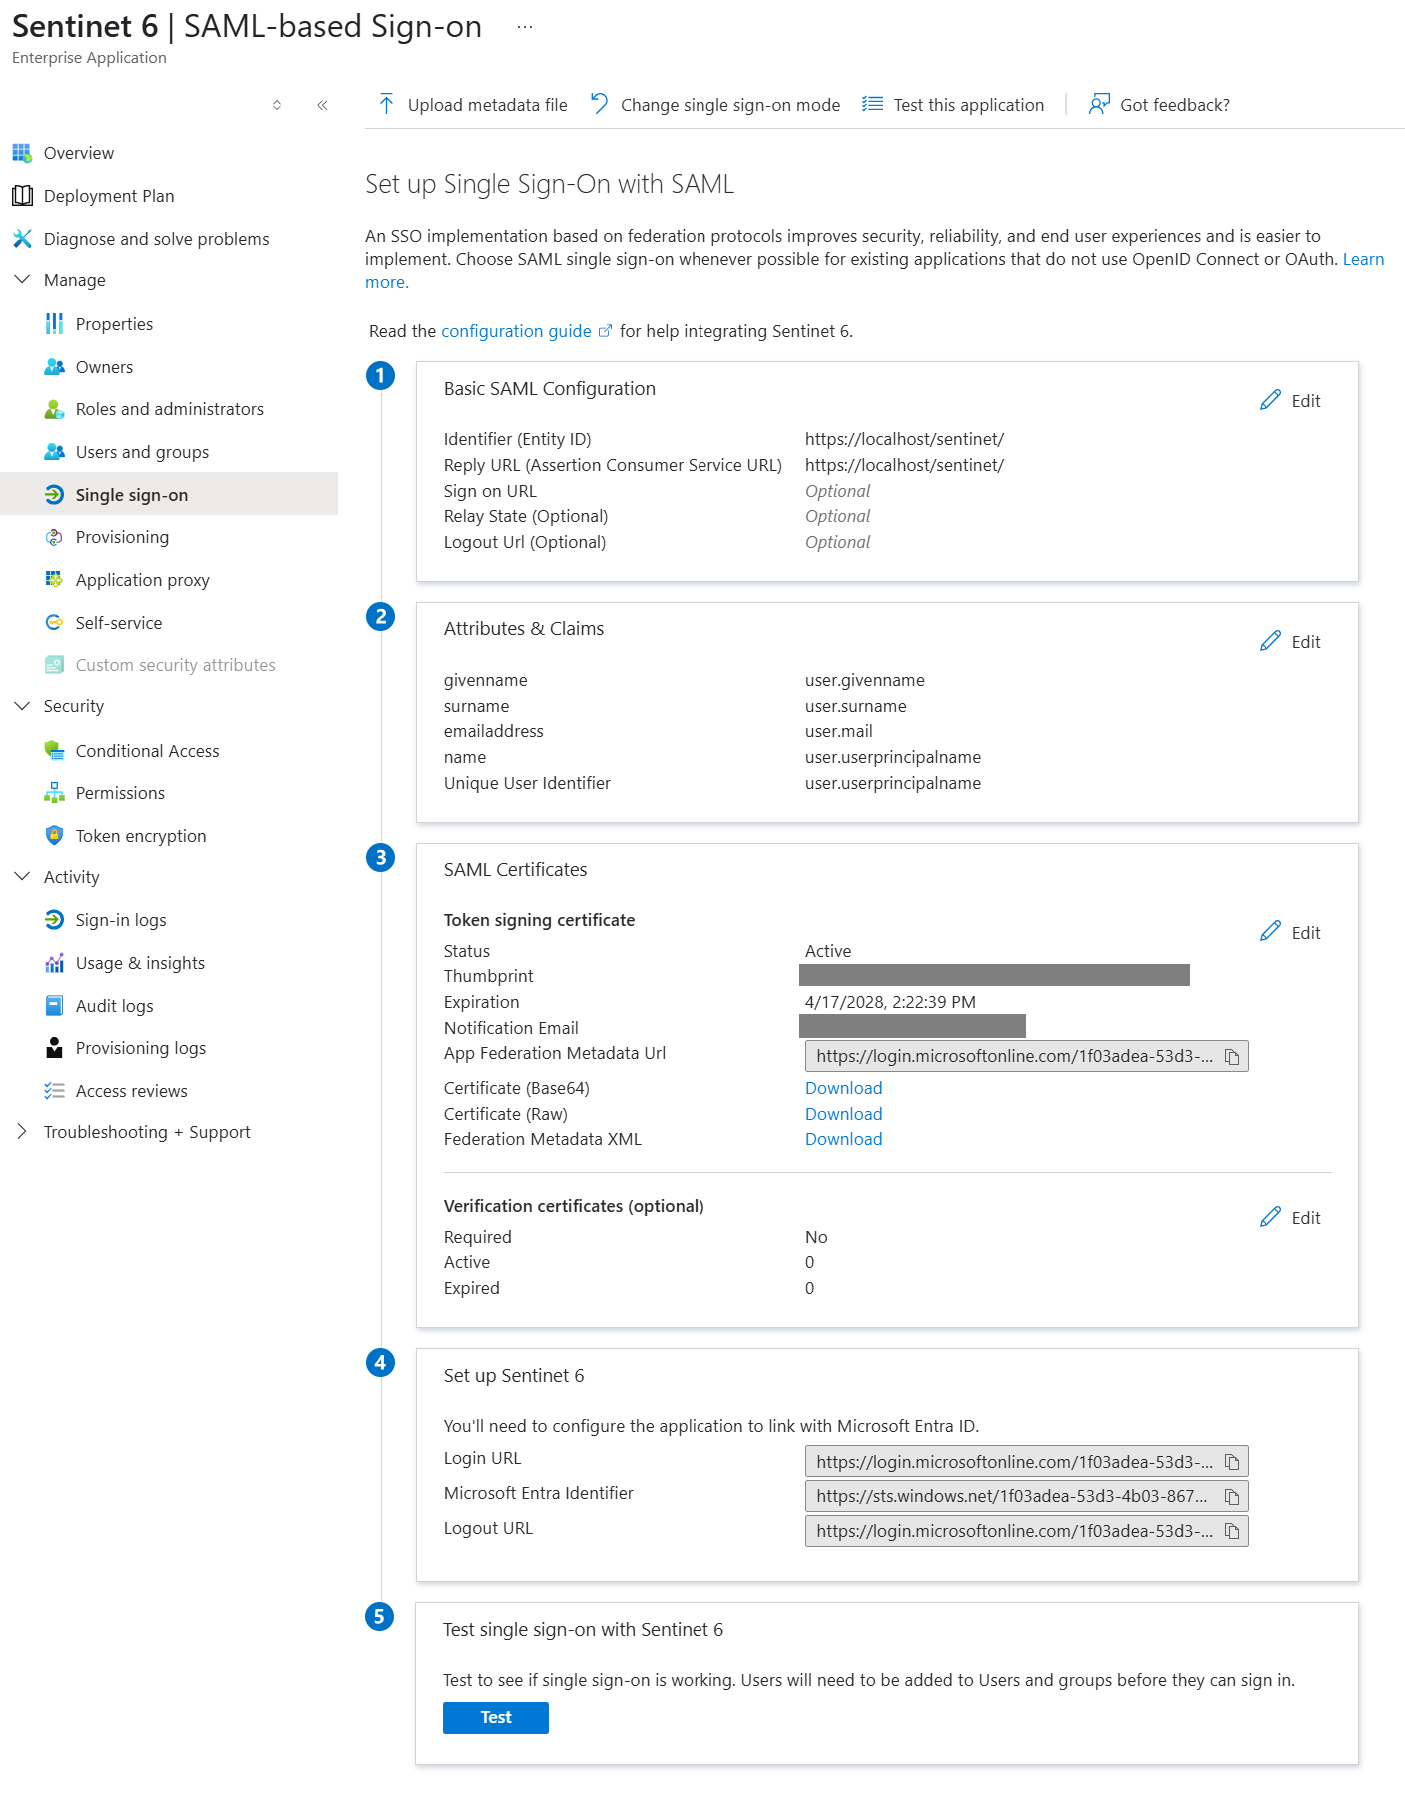
a. From the SAML Certificates section, capture the token signing certificate Thumbprint. Also, download the signing certificate (either Base64 or Raw) and place in the Sentinet Repository server’s Local Machine\Trusted Root CA certificate store. You may also disable the certificate validation on the Sentinet side if you don’t want to deal with the certificate store, but this is not recommended.
b. From the SAML Certificates section, download and review Federation Metadata XML. Capture the token endpoint address from the <SecurityTokenServiceEndpoint/> element. Review the available claims in the <ClaimTypesOffered/> element.
Open and modify the Sentinet Repository web.config as advised below.
Disable Forms authentication:
/configuration/system.web/authentication[@mode=”None”]Enable WS-Federation and Session Authentication Modules by uncommenting the elements:
/configuration/system.webServer/modules/add[@name="WSFederationAuthenticationModule"]

and

/configuration/system.webServer/modules/add[@name="SessionAuthenticationModule"]
Uncomment <trustedIssuers> section and add the trusted token issuer under /configuration/system.identityModel/identityConfiguration/issuerNameRegistry
<trustedIssuers>
  <add name="AzureAD" thumbprint="<thumbprint of the signing certificate>" />
</trustedIssuers>
To control how the token issuing certificate will be validated (or disable validation completely) update the element /configuration/system.identityModel/identityConfiguration/certificateValidation
<certificateValidation revocationMode="NoCheck" trustedStoreLocation="LocalMachine"
    certificateValidationMode="None"/>
Add the trusted token audience under /configuration/system.identityModel/identityConfiguration
<audienceUris mode="Always">
  <add value="<entity identifier>"/>
</audienceUris>
Enable WS-Passive Federation authentication by uncommenting and updating the element /configuration/system.identityModel.services/federationConfiguration/wsFederation
<wsFederation passiveRedirectEnabled="true" freshness="36000"
  issuer="<token endpoint address>"
  realm="<entity identifier>"
  reply="<Sentinet Repository root URL/Reply URL>" />
Specify the claim type to be used for user matching by updating the element /configuration/nevatech.vsb.repository/security/claimsAuthentication
<claimsAuthentication claimType="<claim type>" claimIssuer="AzureAD"/>Typical claim types are:
The summarized configuration changes are shown below
<configuration>
<system.web>
    <authentication mode="None" />
</system.web>
<system.webServer>
    <modules>
        <add name="WSFederationAuthenticationModule" type="System.IdentityModel.Services.WSFederationAuthenticationModule, System.IdentityModel.Services, Version=4.0.0.0, Culture=neutral, PublicKeyToken=b77a5c561934e089" preCondition="managedHandler" />
        <add name="SessionAuthenticationModule" type="System.IdentityModel.Services.SessionAuthenticationModule, System.IdentityModel.Services, Version=4.0.0.0, Culture=neutral, PublicKeyToken=b77a5c561934e089" preCondition="managedHandler" />

...

    </modules>
</system.webServer>
<system.identityModel>
    <identityConfiguration>
        <certificateValidation revocationMode="NoCheck" trustedStoreLocation="LocalMachine"
            certificateValidationMode="None"/>
        <issuerNameRegistry type="Nevatech.Vsb.Repository.Security.CustomIssuerNameRegistry, Nevatech.Vsb.Repository, Version=6.0.0.0, Culture=neutral, PublicKeyToken=f35d905149dcb6c0">
            <trustedIssuers>
                <add name="AzureAD" thumbprint="<thumbprint of the signing certificate>" />
            </trustedIssuers>
        </issuerNameRegistry>
        <audienceUris mode="Always">
            <add value="https://localhost/sentinet/"/>
        </audienceUris>

...

    </identityConfiguration>
</system.identityModel>
<system.identityModel.services>
    <federationConfiguration>
        <wsFederation passiveRedirectEnabled="true" freshness="36000"
                requireHttps="true"
                issuer="<token endpoint address>"
                realm="https://localhost/sentinet/"
                reply="https://localhost/sentinet/" />
    </federationConfiguration>
</system.identityModel.services>
<nevatech.vsb.repository>
    <security>
        <claimsAuthentication
            claimType="http://schemas.xmlsoap.org/ws/2005/05/identity/claims/nameidentifier"
            claimIssuer="AzureAD"/>
    </security>
</nevatech.vsb.repository>
</configuration>
Test the solution by navigating to Sentinet Repository root. You should be redirected to the Entra ID login page and, after successful authentication, be redirected back to Sentinet "Access denied" page.
Review the available user’s claims by navigating to <Sentinet root>/whoami.aspx page. The selected user identifier claim value will be highlighted in green. Copy the claim's value.
(!) The following steps assume you have access to Sentinet via different means or through an already configured administrative account with a mapped external identity claim. If you don't then the above configuration should be rolled back to Forms authentication.
Create a new user or select an existing user that needs to be able to authenticate with Entra ID identity.
Above the "User identities" grid, click "+ Add" to add new identity.
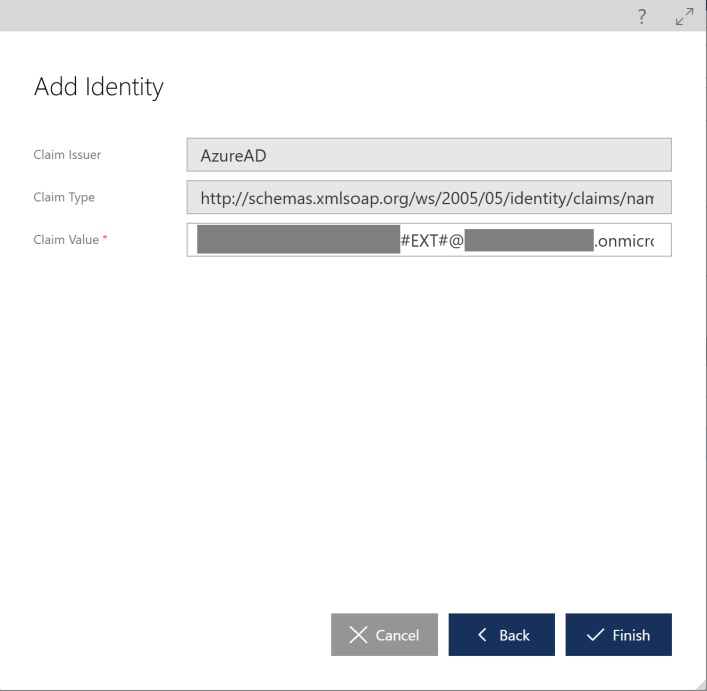
In the "Add Identity" dialog, select "Claim" and click "Next".
Type the previously captured user identity claim value into the "Claim Value" text box and click "Finish".
Click “Save” button to save the user changes.
Useful Links
https://chris.59north.com/post/Configuring-an-ASPNET-site-to-use-WS-Federation